
Laptop hinge repair guide: fix it safely at home
- 8 hours ago
- 19 min read
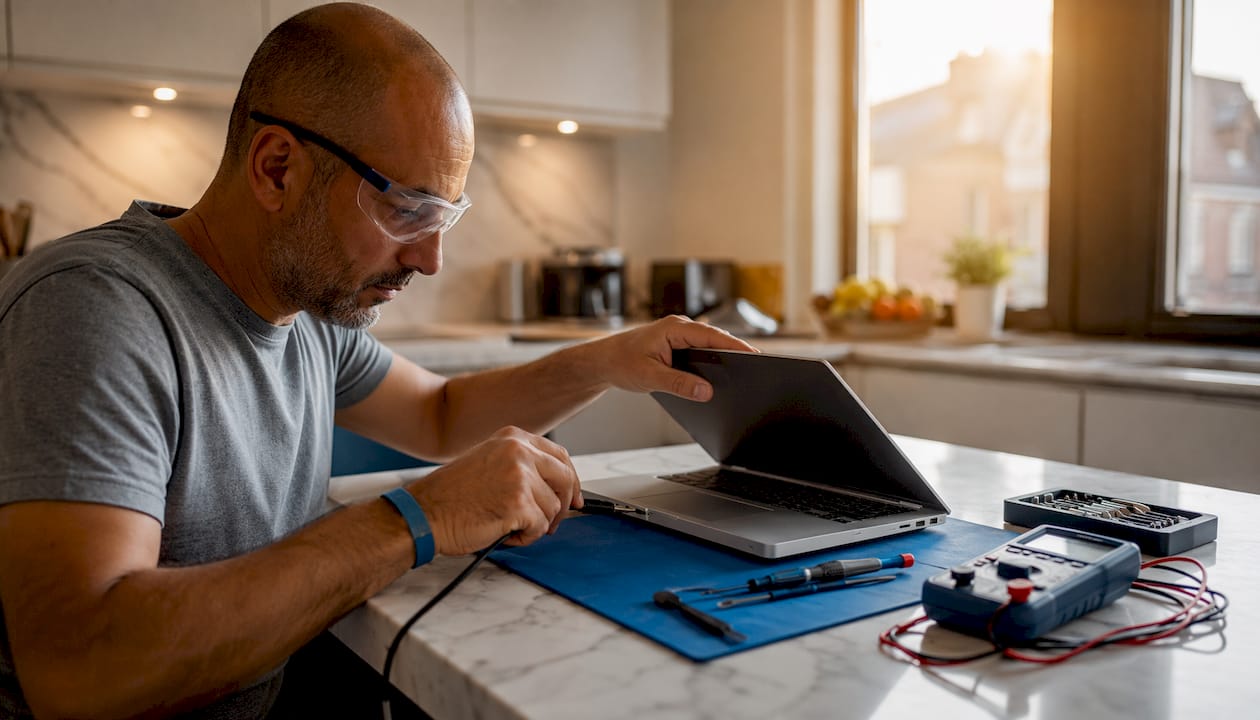
Most laptop hinge problems are fixable at home. Loose screws, worn inserts, and lightly cracked plastic mounts all sit within DIY reach if you have the right tools and take the correct safety steps. Where you should stop and call a professional is when the plastic mounting points are shattered, the display cable shows signs of abrasion, or the lid itself has split. Repair community data shows that more than 60% of laptops older than three years develop hinge-related structural fatigue centred on plastic mounts and brass threaded inserts, not the metal hinge barrel itself. That matters because it changes the repair approach entirely.
Take these steps right now before you do anything else:
Stop opening and closing the lid repeatedly. Every cycle risks abrading the display cable further.
Back up your data. If the hinge has shifted the chassis, the display cable may fail without warning.
Photograph the damage from multiple angles. Shops and parts suppliers will ask for this.
If the lid will not stay open safely, prop it at a fixed angle or tape it open gently while you assess.
If the screen flickers, shows lines, or goes black when you move the lid, treat this as a cable emergency and book a professional repair immediately.
When to call a pro straight away: shattered plastic mounts, visible cable damage, a delaminating screen, or any repair that has already failed once.
Table of Contents
How do you safely disassemble a laptop to access the hinges?
How do you fix loose screws and simple hinge problems at home?
When should you replace the hinge or the whole lid assembly?
What does a hinge repair cost in the UK, and how long does it take?
What are the red flags that mean you should book a professional repair?
How does Rapidrepairsldn approach a professional hinge repair?
What safety steps should you take before opening a laptop?
Getting the safety basics right protects both you and the laptop. Skipping even one step can turn a £40 hinge fix into a £200 screen replacement.
Power and battery first. Shut the laptop down completely, not just sleep. Disconnect the charger and any peripherals. If your model has a removable battery, take it out before you touch anything internal. For laptops with non-removable batteries (most modern thin-and-light designs), you will disconnect the internal battery cable as your very first step after removing the bottom panel.
ESD (electrostatic discharge) protection. Static electricity can silently damage components on the motherboard and display cable. Use an anti-static wrist strap connected to an earthed metal surface, or at minimum work on a non-conductive surface such as a wooden desk rather than a carpet or synthetic mat. Avoid working near radiators, open windows in winter, or any source of humidity extremes.
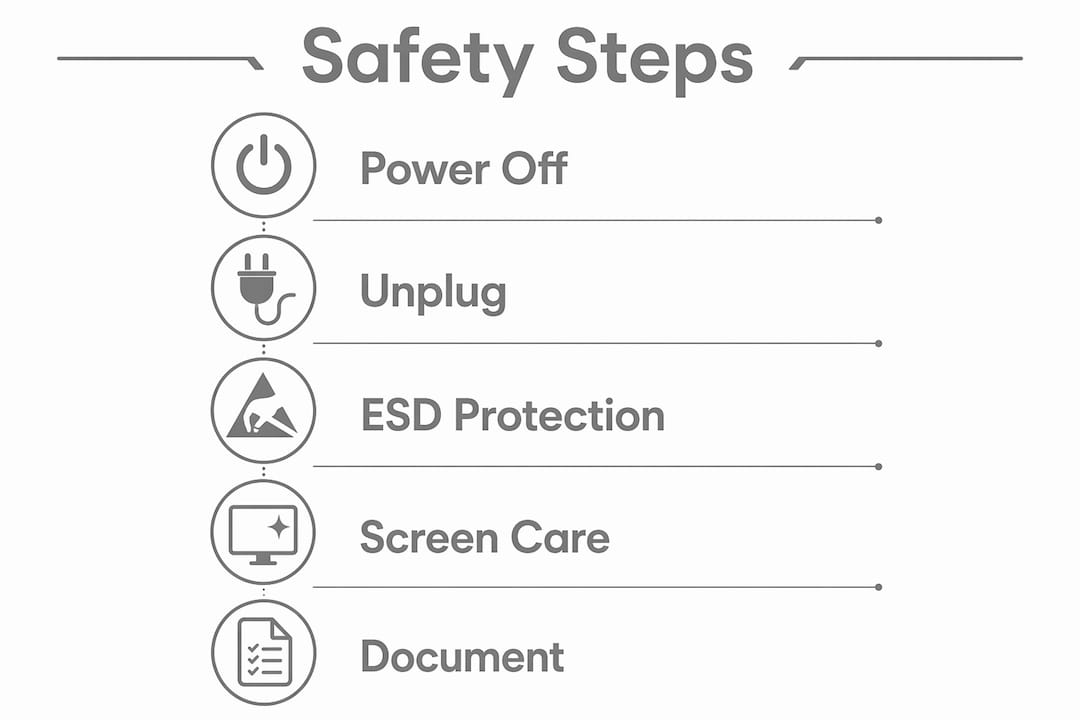
Screen and cable care. Do not force the lid open or closed during diagnosis. Support the lid with one hand at all times. Repeated flexing while the hinge is compromised is one of the most common ways a loose hinge escalates to cable and panel damage.
Document everything before you start. Photograph every stage of disassembly: screw locations, cable routing, connector orientations, and the hinge area itself. Label screws by location using a piece of masking tape or a segmented container. Repair shops routinely request photos of the hinge area before quoting, and your own photos will be invaluable if you need to hand the job over mid-repair.
Pro Tip: Place each screw on a sheet of paper and draw a rough outline of the laptop around them. Mark where each screw came from. This takes two minutes and saves significant time during reassembly.
A note on warranty. Opening the chassis of a laptop that is still under manufacturer warranty may void that warranty. Check your warranty terms before proceeding. Rapidrepairsldn’s technicians can assess hinge damage without voiding any remaining coverage in many cases, so it is worth a quick call if your device is less than two years old.
Safety callout: Ignoring a broken hinge can convert a modest £60 repair into a full screen replacement once the display cable and panel are damaged by the shifting chassis.
What tools and materials do you need for a hinge repair?
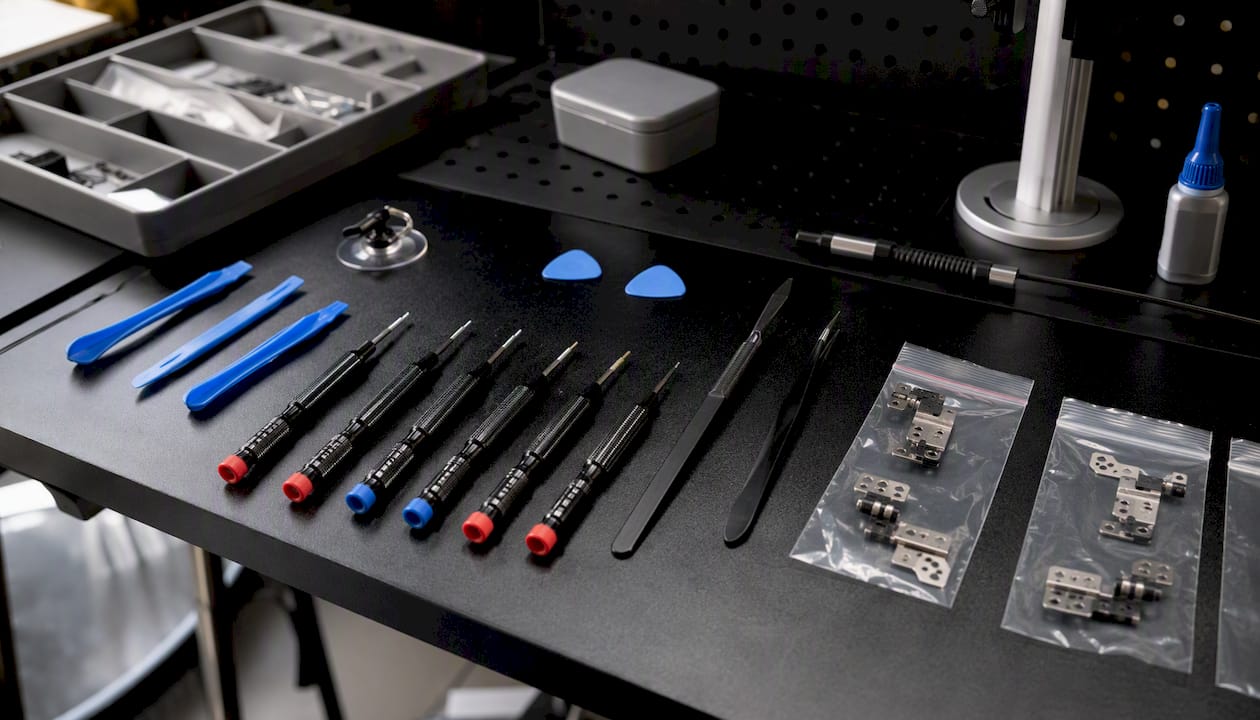
Starting without the right tools is the single most common reason a simple repair goes wrong. Here is what you need, with UK sourcing notes.
Essential tools:
Precision screwdriver set: A PH00 and PH0 Phillips are the most common sizes. Many laptops also use Torx screws (T5, T6, T8), so a Torx set is worth having. iFixit’s Pro Tech Toolkit covers both and is widely available from Amazon UK and Toolstation.
Spudgers and plastic picks: For prying bezels and panels without scratching. Nylon spudgers are safer than metal ones near the display cable. iFixit sells these individually or in sets.
Nut drivers or a small socket set: Useful for hinge barrel nuts on some models.
Anti-static wrist strap: Available from Amazon UK, Maplin’s successor retailers, or CPC Farnell for under £5.
Tweezers: Precision tweezers for handling small screws and connectors.
Magnifying glass or head-mounted loupe: Helpful for inspecting stripped screw threads and hairline cracks.
Consumables and replacement parts:
Replacement screws: Match the thread pitch and length exactly. UK suppliers such as Screwfix and Rapid Online stock metric machine screws in small quantities. For laptop-specific screws, eBay UK and Amazon UK sellers often list by model number.
Brass threaded inserts: For repairing stripped screw bosses. Available from RS Components and CPC Farnell.
Backing washers: Small steel or nylon washers that spread load across a cracked plastic mount.
Small metal reinforcement brackets: Thin aluminium or steel plates used to bridge cracked plastic. Available from hardware stores or cut from hobby sheet metal.
Two-part structural epoxy (e.g. JB Weld or Araldite Rapid): Both are widely stocked at Halfords, B&Q, and Amazon UK.
Cyanoacrylate (CA) adhesive and bicarbonate of soda: The CA + baking soda method creates a hard, gap-filling composite. CA is available at any hardware or hobby shop.
Blue threadlocker (e.g. Loctite 243): Prevents screws from vibrating loose without permanently locking them. Available at Halfords and most automotive retailers.
Isopropyl alcohol (IPA) wipes: For cleaning surfaces before adhesive application.
Pro Tip: Buy hinges in pairs even if only one side has failed. The other hinge has endured the same number of cycles and will often fail within months of the first.
How do you diagnose the type and severity of hinge damage?
A quick, systematic check before you open the laptop tells you which repair route to take and whether DIY is safe to attempt.
Symptom checklist:
Wobble or loose lid: The lid does not hold its angle and drifts forward or backward. Usually indicates a worn friction washer, loose hinge screws, or a pulled-out screw boss.
Creaking or grinding: Often points to debris in the hinge barrel, a dry friction surface, or early metal fatigue.
Stiffness or excessive force needed to open: Can indicate rust or corrosion in the barrel, a seized hinge, or a bent hinge arm.
Visible gap or crack near the hinge: The plastic housing has fractured. This is the most common type of hinge damage and usually means the screw bosses are compromised.
Display artefacts (flicker, lines, blackouts when moving the lid): The display cable is being stretched or pinched by hinge movement. This is an urgent warning sign.
Quick hands-on checks (lid closed, laptop on a flat surface):
Gently open the lid from the centre and feel for uneven resistance between left and right hinges.
With the lid open at 90°, try to wobble it gently side to side. Any play suggests loose screws or failed inserts.
Run a finger along the bezel edge near each hinge. Raised edges, cracks, or gaps indicate housing failure.
Open and close the lid slowly while watching the screen for any flicker or colour shift.
Symptom | Likely cause | DIY viable? | Risk to other components |
Lid wobbles, holds angle | Loose hinge screws | Yes | Low if addressed quickly |
Lid drifts open/closed | Worn friction washer | Yes (hinge swap) | Low |
Creaking, no visible damage | Debris or dry barrel | Yes | Low |
Visible crack near hinge | Cracked plastic mount | Partial (epoxy/bracket) | Medium |
Screw spins freely | Stripped boss or insert | Yes (epoxy + insert) | Medium |
Screen flickers on movement | Display cable damage | No — book a pro | High |
Shattered plastic, multiple cracks | Structural failure | No — book a pro | High |
Beyond DIY: if the plastic mounts are shattered across both hinges, if the screen shows artefacts, or if a previous repair has already failed, stop here and book a professional assessment.
How do you safely disassemble a laptop to access the hinges?
The disassembly sequence varies by model, but the underlying logic is consistent. Always consult a model-specific teardown before you start. iFixit’s repair guides cover hundreds of models and are the most reliable free resource for cable routing and hidden clip locations.
Workspace preparation:
Clear a clean, well-lit surface. A silicone mat or anti-static mat is ideal.
Have your labelled screw container, phone camera, and plastic picks within reach.
Keep liquids away from the workspace entirely.
Step-by-step disassembly sequence:
Power down and disconnect. Shut down fully, unplug the charger, and disconnect all peripherals.
Remove the bottom panel. Most laptops use Phillips or Torx screws around the perimeter and sometimes under rubber feet. Lift the panel with a plastic spudger, starting at a corner. The Dell XPS 15 9510, for example, uses eight T5 Torx screws and requires a nylon spudger to release the clips without marking the chassis.
Disconnect the internal battery cable. Even if the battery is non-removable, disconnect its cable from the motherboard before touching anything else.
Photograph cable routing. Before touching any cables, photograph the display cable, webcam cable, and Wi-Fi antenna cable routing through the hinge channel. These photos are your reassembly reference.
Remove the display bezel (if required). On many models, the hinge screws on the lid side are hidden under the bezel. Use a plastic pick to gently release the clips starting at the bottom corners. Work slowly; forcing a clip will crack the bezel.
Disconnect the display cable. Pull the connector straight out from its socket. Never pull on the cable itself. Slide it out parallel to the board.
Remove hinge screws. There are typically two to four screws per hinge on the base side and two to four on the lid side. Keep base-side and lid-side screws in separate labelled sections of your container, as they are often different sizes.
Separate the lid from the base. Lift the display assembly away carefully once all hinge screws are removed.
Pro Tip: Search YouTube for your exact laptop model number followed by “hinge replacement” before you start. A three-minute video specific to your model is worth more than any generic guide when it comes to hidden clips and cable routing.
How do you fix loose screws and simple hinge problems at home?
For many laptops, the fix is straightforward: the hinge screws have simply worked loose over time, and retightening them restores normal function. The key is finding the right tension without causing new damage.
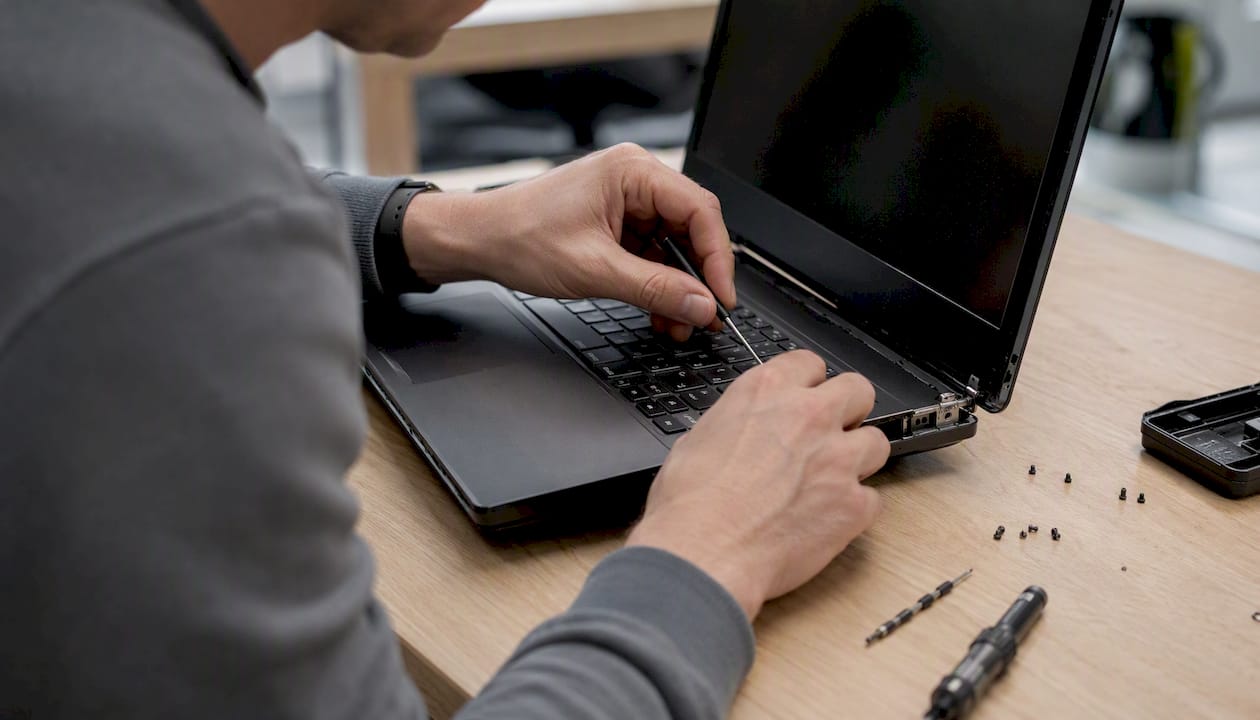
Retorquing hinge screws safely. Use the correct screwdriver size and turn each screw a quarter-turn at a time. Test the lid’s resistance after each increment. You are looking for a “Goldilocks” tension: firm enough that the lid holds its angle, but not so tight that you are stressing the plastic mount around the screw boss. iFixit’s guidance recommends inspecting three sets of screws: the hinge-to-base screws, the hinge-to-lid screws, and any screws securing the hinge bracket to the chassis. Overtightening to remove wobble is a common mistake that shifts torque into thin plastic mounts and can cause catastrophic failure.
When to use threadlocker. Apply a small drop of blue threadlocker (Loctite 243) to a screw that has worked loose more than once. Blue threadlocker holds the screw in place under vibration but still allows removal with a screwdriver. Do not use red threadlocker on laptop screws; it is designed for permanent bonds and will strip the boss when you try to remove it.
Backing washers and replacement screws. If a screw boss is slightly damaged but still functional, a small backing washer spreads the load across a wider area of plastic and reduces the risk of the boss cracking further. Replace any screw that shows signs of thread damage with an exact-match replacement.
Small metal brackets. A thin aluminium or steel plate bridging a hairline crack in the plastic mount can act as a semi-permanent reinforcement. Secure it with the existing hinge screws and a small amount of epoxy on the underside. This is a practical temporary fix that buys time while you source a replacement part.
Verification after each repair. Open and close the lid ten times slowly. Check that the lid holds its angle at 45°, 90°, and 120°. Run the display cable check again: watch for flicker or colour shift as you move the lid through its range.
When does glue or epoxy actually work on a laptop hinge?
Adhesive repairs have a specific and limited role in hinge repair. Used correctly, they can restore a stripped screw boss to full function. Used incorrectly, they create a false sense of security and delay a proper fix.
Which adhesives work:
CA + bicarbonate of soda: Dropping bicarbonate of soda into a stripped boss and wicking in thin CA adhesive creates a hard, gap-filling composite that can be re-drilled and re-tapped. This is the most widely validated method in the repair community for mildly degraded inserts.
Two-part structural epoxy (JB Weld, Araldite Rapid): Best for bonding cracked plastic sections back together or anchoring a loose brass insert. JB Weld offers a cure time of roughly 4–6 hours for handling strength and 24 hours for full cure.
Epoxy with fibre mesh tape: Applying a small piece of fibreglass mesh tape over the repair before the epoxy cures adds tensile strength to the bond, particularly useful on thin plastic bezels.
What does not work: standard household PVA, hot glue, and superglue alone (without the baking soda composite method) all fail quickly under the cyclical stress of hinge movement.
Step-by-step epoxy repair for a stripped boss:
Clean the area thoroughly with an IPA wipe and allow it to dry completely.
If using CA + baking soda, pack the boss cavity with baking soda, then apply thin CA in small drops until the cavity is filled. Allow to cure for 10 minutes before drilling.
If using two-part epoxy, mix according to the manufacturer’s instructions and apply to the cleaned surface. Use a cocktail stick or toothpick for precision.
Jig the insert or hinge in the correct position and hold it with tape or a small clamp while the adhesive cures. Do not rush this step.
After full cure (24 hours for most structural epoxies), sand any excess flush with the surrounding surface before reassembly.
Failure modes to watch for. Community repair data shows poor results when the plastic substrate is powdery or crumbled, or when inserts have rotated more than roughly 15° from their original position. If the boss crumbles when you clean it, or if the insert spins freely even after an epoxy repair, the housing needs replacement rather than adhesive treatment.
Pro Tip: Keep epoxy away from the hinge barrel itself and well clear of any cables. Mask off the surrounding area with tape before mixing. Fumes from CA adhesive are an irritant; work in a ventilated space and avoid leaning over the repair.
When should you replace the hinge or the whole lid assembly?
Some hinge problems are beyond what tightening or adhesive can address. A full hinge replacement is an intermediate-level repair, but it is often the most reliable long-term solution.
Parts identification checklist:
Note your laptop’s exact model number (printed on a sticker on the base or in System Information / About This Mac).
Identify whether you need the left hinge, right hinge, or both. Buy both even if only one has failed.
Search for the hinge part number using your model number on eBay UK, Amazon UK, or dedicated parts sites such as 4Laptop.co.uk or LaptopScreen.co.uk.
Compare photos of the listed part against your existing hinge before purchasing. Check the mounting hole pattern and barrel diameter.
For lid or back housing replacement, you will also need the back cover part number, which is usually listed in the OEM service manual.
Sourcing parts in the UK. OEM parts offer the best fit and finish but carry higher prices and longer lead times (sometimes 5–10 working days from specialist suppliers). Good-quality aftermarket hinges from established eBay UK sellers or Amazon UK are usually adequate for most consumer laptops and arrive faster. Check the seller’s return policy before buying; a hinge that does not fit is a common frustration.
Alignment during reassembly. When fitting new hinges, start with the lid-side screws finger-tight, then align the display assembly squarely on the base before tightening the base-side screws. Misalignment at this stage pinches the display cable in the hinge channel, which is one of the most common causes of post-repair screen problems. Route the display cable through the hinge channel before tightening any screws.
When replacement restores full life expectancy. A hinge swap on a laptop with an otherwise intact chassis and undamaged housing typically restores the device to normal function. If the housing itself is cracked or the palmrest is deformed, replacing the hinge alone will not resolve the structural problem, and the repair may be poor value compared to the device’s resale price. For guidance on that decision, the repair vs replacement guide on the Rapidrepairsldn blog is a useful reference.
How do you reassemble and test after a hinge repair?
Reassembly in the correct order prevents the most common post-repair problems: trapped cables, stripped screws, and display artefacts.
Route all cables before fitting the hinge screws. Lay the display cable, webcam cable, and Wi-Fi antenna cable through their respective channels and confirm they are not kinked or pinched.
Fit lid-side hinge screws finger-tight first. Do not tighten fully until the display assembly is aligned squarely on the base.
Reattach the display assembly to the base. Hold the lid at 90° and lower it onto the base, checking that the hinge arms seat correctly in their recesses.
Tighten base-side hinge screws gradually. Work in a cross pattern, a quarter-turn at a time, to distribute load evenly. Snug is correct; overtightening strips the boss.
Reconnect the display cable, webcam cable, and antenna cables. Press each connector straight in until it clicks. Do not force.
Reconnect the internal battery cable.
Before fitting the bottom panel, power on the laptop. This is your first test opportunity.
Run the test sequence:
Open and close the lid ten times through its full range. Listen for creaking and feel for uneven resistance.
Check the display at multiple angles for flicker, lines, or colour shifts.
Confirm the webcam and Wi-Fi are functional (a disconnected antenna cable is a common oversight).
Leave the laptop open at 90° for five minutes and check that the lid holds its angle without drifting.
Fit the bottom panel and bezel. Press clips home firmly but evenly. Replace all screws.
Final open/close check. Ten more cycles with the laptop fully assembled. If everything is stable, the repair is complete.
Common post-reassembly problems: a display that flickers usually means the cable connector is not fully seated; re-open and reseat it. A lid that still wobbles after tightening suggests the insert or boss is still compromised and needs the epoxy treatment described above.
What does a hinge repair cost in the UK, and how long does it take?
Realistic cost and time expectations help you decide whether DIY is worth the effort or whether a workshop repair makes more sense.
Repair type | DIY cost (parts) | Professional cost (parts + labour) | DIY time | Pro time | Difficulty | Risk to other components |
Retighten screws | £0–£5 | £30–£60 | 30–60 min | Same day | Low | Low |
Replace stripped screw / epoxy boss | £5–£15 | £40–£60 | 1–3 hrs (inc. cure) | Same day | Medium | Low–medium |
Replace hinge (one or both) | £15–£40 | £80–£150 | 1–2 hrs | Same day | Medium | Medium |
Replace hinge + cracked housing | £30–£70 | £120–£200 | 2–4 hrs | 1–3 days | High | Medium–high |
Full lid assembly replacement | £40–£90 | £150–£280 | 3–5 hrs | 1–5 days | High | High |
Decision rule. If the total professional repair cost approaches or exceeds 40–50% of the laptop’s current resale value, replacement is worth serious consideration. For a five-year-old budget laptop worth £150, a £200 lid replacement is hard to justify. For a two-year-old premium device worth £900, a £120 hinge swap is straightforward value. The Rapidrepairsldn laptop screen replacement cost guide covers the escalation scenario where a hinge repair also requires screen work.
Time note. Epoxy repairs require 24 hours of cure time before reassembly. Factor this into your schedule; a repair started on a Monday evening will not be ready for testing until Tuesday evening at the earliest.
What are the red flags that mean you should book a professional repair?
Some situations genuinely require a workshop. Recognising them early saves money and prevents further damage.
Book a professional if you see any of these:
Shattered or crumbled plastic mounts across one or both hinge points.
The display flickers, shows lines, or goes black when you move the lid, indicating display cable damage.
Visible abrasion marks or kinks on the display ribbon cable.
Multiple failed inserts where epoxy repairs have already been attempted and failed.
Melted plastic, corrosion, or signs of liquid damage near the hinge area.
The lid has split or delaminated along the hinge line.
Any repair that requires removing the display panel itself (screen delamination, cracked glass).
What a professional workshop offers that DIY cannot easily replicate: bench alignment jigs that hold the chassis square during hinge fitting; ultrasonic cleaning of corroded hinge barrels; access to OEM parts with verified compatibility; and a documented repair with a parts and labour warranty. Professional repair benefits extend beyond the fix itself to include accountability and post-repair guarantees.
Documentation and insurance. Shops photograph damage on arrival, which creates a clear record of the device’s condition before any work begins. This matters for insurance claims and for resolving any disputes about pre-existing damage.
What habits prevent hinge problems in the first place?
Prevention is cheaper than repair. A few consistent habits reduce hinge stress significantly.
Daily habits:
Always open the lid from the centre, using both hands where possible. Opening from one corner loads a single hinge unevenly and is one of the primary causes of hinge failure.
Never lift a laptop by its screen. Carry it by the base with the lid closed.
Close the lid gently. Slamming it shut subjects the hinges to repeated shock loads.
Do not push the screen back beyond its designed opening angle. Most laptop hinges are rated to 135°–140°; forcing beyond that range causes immediate stress.
Monthly and periodic habits:
Use a can of compressed air to blow dust and debris out of the hinge area every 6–12 months. Dust accumulation increases friction and traps moisture, both of which accelerate wear.
Inspect the hinge area visually for hairline cracks, raised bezel edges, or gaps. Catching a crack early means a £15 epoxy fix rather than a £150 housing replacement.
If the hinge feels stiffer than usual, a very small amount of silicone-based lubricant applied to the barrel can restore smooth movement. Avoid WD-40; it attracts dust and degrades plastic over time.
Storage and transport:
Always carry a closed laptop in a padded bag sized for the device. An oversized bag allows the laptop to shift and absorb impacts on its corners, which is a common cause of hinge damage from drops.
Do not stack heavy items on top of a closed laptop.
Avoid leaving the laptop in direct sunlight or in a hot car; thermal cycling weakens plastic components over time.
How does Rapidrepairsldn approach a professional hinge repair?
Understanding what happens at a professional workshop helps you decide whether to DIY or book in, and sets clear expectations if you choose the latter.
Workshop workflow at Rapidrepairsldn:
Inbound diagnostic: Every device is photographed on arrival. The technician documents the hinge condition, any existing cracks, and the state of the display cable before any work begins.
Bench teardown: The laptop is fully disassembled on an anti-static bench. The hinge, housing, and display cable are inspected under magnification.
Parts quote: The technician identifies the correct OEM or high-quality aftermarket parts and provides a written quote before any repair work starts. No surprises.
Repair and burn-in testing: After fitting, the device goes through a series of open/close cycles and display tests. Wi-Fi and webcam function are confirmed before the laptop is returned.
Warranty: Rapidrepairsldn documents the repair and provides a warranty on parts and labour, so you have a clear record if anything needs revisiting.
What the workshop can do that most DIY setups cannot: a bench alignment jig holds the chassis square while hinge screws are torqued, preventing the cable pinching that causes post-repair screen problems. Ultrasonic cleaning removes corrosion from seized hinge barrels without disassembling the barrel itself. OEM part matching means the replacement hinge has the correct friction specification for the model, not a generic approximation.
Pro Tip: When contacting Rapidrepairsldn for a quote, send two or three clear photos of the hinge area and note the exact model number. This allows the team to identify the correct parts before you arrive and often means the repair can be completed the same day.
Key takeaways
Most laptop hinge repairs are DIY-viable when the damage is limited to loose screws or mildly degraded inserts, but shattered mounts, cable damage, or a failed previous repair are clear signals to book a professional.
Point | Details |
Stop using the lid immediately | Every open/close cycle risks abrading the display cable further and escalating repair costs. |
Diagnose before you disassemble | Map the symptom to the likely cause using the table above; this determines whether you tighten, epoxy, or replace. |
Epoxy works only on intact substrates | CA + baking soda or two-part structural epoxy succeeds on mildly compromised inserts, but fails on crumbled substrates or inserts rotated more than 15°. |
DIY hinge replacement costs vary but are generally low, while professional repair costs for a straightforward hinge swap are substantially higher. Factor in additional costs if housing damage is present. | |
Rapidrepairsldn for complex cases | For shattered mounts, cable damage, or failed DIY repairs, Rapidrepairsldn offers same-day diagnostics and a documented warranty repair. |
The mistake most DIYers make with hinge repairs
The most common error is treating a hinge problem as a screw problem. A technician sees it repeatedly: someone tightens the hinge screws until the wobble stops, reassembles the laptop, and considers it fixed. Three weeks later, the plastic boss cracks completely because the tightening shifted all the torque into already-stressed plastic rather than distributing it across the hinge assembly.
The second most common mistake is skipping the display cable check. A hinge that wobbles is annoying; a display cable that has been slowly abraded by a shifting chassis is a much more expensive problem. The cable check takes 30 seconds and should happen before and after every repair attempt.
There is also a tendency to rush the epoxy cure. Structural epoxies need a full 24 hours to reach working strength. A repair tested at four hours may feel solid and then fail under normal use within days. Patience here is not optional.
If you are unsure at any point, the right call is to stop, document where you are, and bring the laptop in. A partially disassembled laptop with labelled screws and photos is far easier for a technician to work with than one that has been reassembled incorrectly.
Rapidrepairsldn’s laptop hinge repair service
When the damage is beyond a simple tighten or the repair feels outside your comfort zone, Rapidrepairsldn’s laptop repair service covers the full range of hinge work: diagnostic assessment, hinge replacement, housing repair, lid assembly replacement, and display cable checks. Every repair is photographed on arrival, completed with OEM or high-quality aftermarket parts, and backed by a parts and labour warranty.
Based in north London, Rapidrepairsldn offers same-day turnaround for most straightforward hinge repairs. Drop-in diagnostics are available, and the team can usually give you a firm quote within minutes of inspecting the device. For more complex jobs involving housing or screen damage, lead times are typically one to three working days. To book or get a quote, visit the Rapidrepairsldn laptop page or drop in to the shop with your device and your photos of the damage.
Useful sources, teardowns and UK parts suppliers
Model-specific teardowns and service guides:
iFixit (ifixit.com): The most comprehensive free library of laptop teardowns, including step-by-step hinge replacement guides for Dell, HP, Lenovo, Asus, Acer, and Apple models. Search your exact model number. The iFixit hinge tightening guide is a reliable starting point for loose-hinge diagnosis.
Restarters Wiki (restarters.net): A community repair wiki with practical notes on common hinge failure patterns and repair approaches, contributed by repair café volunteers across the UK.
OEM service manuals: Search “[your laptop model] service manual PDF” on Google. Dell, Lenovo, and HP publish official service manuals freely. Apple service manuals are available through Apple’s Self Repair programme. Always verify the manual matches your exact sub-model.
UK parts suppliers:
eBay UK (ebay.co.uk): The largest selection of laptop-specific hinges and housing parts. Filter by your model number and check seller feedback carefully. Look for listings that include compatibility notes and a returns policy.
Amazon UK (amazon.co.uk): Good for hinge pairs and tool kits with fast delivery. Check product descriptions for part number compatibility.
4Laptop.co.uk and LaptopScreen.co.uk: Specialist UK laptop parts suppliers with model-specific search tools. Useful for lid assemblies and display cables alongside hinges.
CPC Farnell (cpc.farnell.com) and RS Components (rs-online.com): For brass threaded inserts, backing washers, and precision fasteners.
How to verify a part before buying:
Cross-reference the part number from the OEM service manual against the listing.
Compare photos of the listed part against your existing hinge (mounting hole pattern, barrel diameter, arm length).
Check that the listing states compatibility with your exact model number, not just the product family.
Confirm the supplier’s return policy before purchasing; a hinge that does not fit is a common issue with aftermarket parts.
Recommended