
iPhone touchscreen unresponsive? Fix it step by step

A force restart resolves the majority of unresponsive iPhone touchscreen cases, particularly after an iOS update, and it takes under a minute with zero data loss. If that does not work, removing accessories, cleaning the screen, and checking for moisture will fix most remaining cases before you need to touch any settings.
Here is what to do right now, in order:
Force restart your iPhone (see model-specific sequences below).
Disconnect all cables and accessories — chargers, headphones, anything in the Lightning or USB-C port.
Remove your case and screen protector, then wipe the screen with a dry, lint-free cloth.
Check for moisture or visible cracks. If you see either, stop here and skip to the hardware section.
If the phone feels warm or appears to be mid-update, wait 15–30 minutes before trying anything else. Forcing a restart during an active update can corrupt the installation.
Before you go further: do not attempt to open the device or perform a factory reset yet. These first steps carry no data-loss risk and resolve the majority of post-update freezes on their own.
Pro Tip: If your screen is completely unresponsive but Face ID or Touch ID still unlocks the phone, you have partial function. Use that to back up via iCloud before attempting any software restore.
Table of Contents
What are the safest first steps to fix an unresponsive iPhone touchscreen?
How do software issues cause an unresponsive touchscreen, and how do you fix them?
What hardware problems can cause an iPhone screen to stop responding?
How to use Recovery Mode and DFU mode safely, and what data do you risk?
When should you stop troubleshooting and book a professional repair?
How does a repair shop diagnose an unresponsive touchscreen?
What the repair bench actually tells us about unresponsive iPhones
What are the safest first steps to fix an unresponsive iPhone touchscreen?
These steps carry no data-loss risk and take five minutes or less in total.
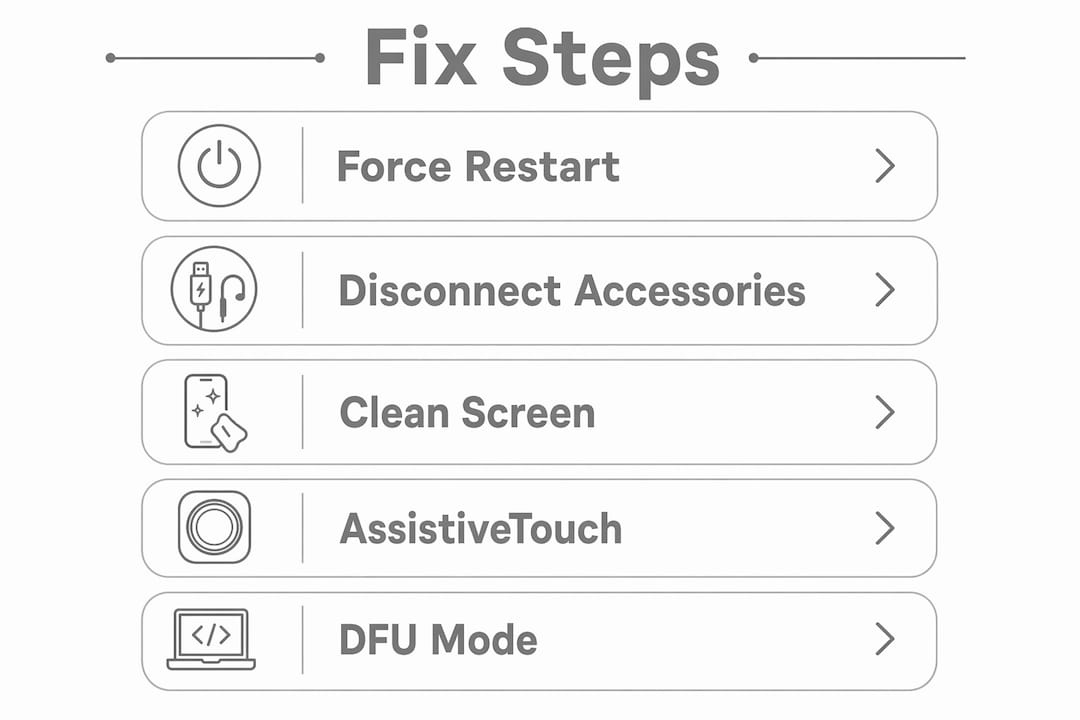
Step 1: Force restart (model-specific sequences)
A force restart clears the active memory without touching your files or settings. Apple Support recommends this as the first action when the screen is not responding.
iPhone 8, iPhone SE (2nd/3rd gen), iPhone X and all later models:
Press and quickly release Volume Up.
Press and quickly release Volume Down.
Press and hold the Side button until the Apple logo appears, then release.
iPhone 7 / 7 Plus:
Press and hold Volume Down and the Sleep/Wake button simultaneously until the Apple logo appears.
iPhone 6s, 6s Plus, SE (1st gen) and earlier:
Press and hold the Home button and the Sleep/Wake button together until the Apple logo appears.
The device should restart within a short time. If the Apple logo appears and the screen responds normally, you are done.
Step 2: Disconnect accessories and check the charger

Accessories plugged into the Lightning or USB-C port can occasionally interfere with touch sensitivity. Unplug everything, wait 10 seconds, then test the screen. If you were charging from a low battery, connect a known-good Apple-certified cable and charger and leave it for a while before retrying.
Step 3: Clean the screen safely
Dirt, grime, or moisture on the display can mimic a software freeze because iPhones use capacitive touch, which relies on electrical conductivity from your fingertip. Remove the screen protector and case, then wipe the screen gently with a dry microfibre cloth. Do not use water, alcohol wipes, or compressed air directly on the display.

Step 4: Use AssistiveTouch as a temporary workaround
If part of the screen still responds, you can enable AssistiveTouch to navigate without relying on the unresponsive area:
Go to Settings > Accessibility > Touch > AssistiveTouch and toggle it on.
Alternatively, ask Siri to “Turn on AssistiveTouch.”
This gives you a floating on-screen button that replicates Home, lock, and gesture controls, buying you time to back up or navigate to further settings.
Pro Tip: Voice Control (Settings > Accessibility > Voice Control) lets you tap, scroll, and type entirely by voice if the touchscreen is fully dead but the microphone works.
Force restart: under 1 minute, no data loss.
Accessory disconnect and charger swap: 2–3 minutes, no data loss.
Screen clean and protector removal: 2 minutes, no data loss.
AssistiveTouch setup: 1 minute via Siri, no data loss.
How do software issues cause an unresponsive touchscreen, and how do you fix them?
Software problems are the most common cause of a frozen or unresponsive display, and most can be resolved without erasing anything.
Close or reinstall a misbehaving app
If the screen freezes only inside one app, swipe up from the bottom (or double-press Home on older models) to open the App Switcher, then swipe the offending app away. If the problem returns, delete the app and reinstall it from the App Store. This takes under two minutes and loses no personal data outside that app.
Update iOS
An outdated iOS version can leave the touch driver in a broken state, particularly after a partial update. If you can navigate to Settings > General > Software Update, install any available update from there. If the screen is too unresponsive to navigate, connect your iPhone to a Mac or PC and update through Finder (macOS Catalina and later) or iTunes (Windows or older macOS). Select your device, then click Check for Update.
Recovery Mode with ‘Update’ selected can reinstall iOS without erasing your data when the process completes successfully. This is the right move if a standard update fails and the screen is partially responsive. Only choose ‘Restore’ if ‘Update’ fails or the device will not proceed.
Recovery Mode: step-by-step
Connect your iPhone to a Mac or PC.
Open Finder or iTunes.
Enter Recovery Mode using the same button sequence as a force restart for your model, but keep holding the Side button (or Home button on older models) after the Apple logo appears until you see the Connect to Computer screen.
In Finder or iTunes, click Update first. This downloads and reinstalls iOS while attempting to preserve your data. The download alone can take 15–30 minutes depending on your connection.
If Update fails, click Restore. This erases the device and installs a clean iOS. Back up first if at all possible.
DFU mode: last software resort
Device Firmware Update (DFU) mode bypasses the bootloader entirely and is the deepest software reset available. Use it only after Recovery Mode has failed. The entry sequence varies by model and is easy to get wrong; search Apple’s support pages for your specific model. DFU almost always erases the device, so treat it as a last resort. If you have no backup and the screen is partially responsive, back up via iCloud (Settings > [your name] > iCloud > iCloud Backup > Back Up Now) before proceeding.
What hardware problems can cause an iPhone screen to stop responding?
Once you have ruled out software causes, the issue is almost certainly physical. These are the signs to look for before booking a repair.
Dead zones: areas of the screen that do not respond to touch even after a full restore. Rotate to landscape mode to check whether the dead zone moves with the display or stays fixed to a screen region.
Visible cracks: inspect the glass at a low angle under bright light. Hairline cracks near the corners or edges can sever the digitiser layer without being obvious head-on.
Liquid residue: look for fogging under the glass, corrosion around the SIM tray, or a triggered liquid contact indicator (a small red dot visible in the SIM slot on most models).
Swelling: if the back of the phone bows outward or the screen lifts at the edges, the battery may be swollen and pressing against the display connector.
Recent screen replacement: third-party screens vary significantly in quality, and a poorly sourced replacement is a common cause of persistent touch problems after a repair.
Do not open the iPhone at home unless you have the correct tools and experience. Attempting to reseat connectors without the right equipment risks tearing flex cables, damaging the battery, and voiding any remaining warranty or AppleCare coverage.
If you suspect water damage, remove the SIM card to improve airflow and leave the phone in a warm, dry place for 24–48 hours. Avoid heat sources such as radiators or hair dryers, as these can warp internal components. For more detail on what happens inside a water-damaged device, the guide on rescuing water-damaged devices covers the corrosion process and early steps in plain terms.
Apple runs model-specific service programmes for certain display and touch faults. Check Apple Support with your serial number to see whether your device qualifies for a free or subsidised repair before paying out of pocket.
How to use Recovery Mode and DFU mode safely, and what data do you risk?
These are the two most powerful software tools available, and both carry real consequences if used without preparation.
Before you start: back up
If the screen is partially responsive, back up immediately:
iCloud: Settings > [your name] > iCloud > iCloud Backup > Back Up Now.
Finder/iTunes: connect to a computer, select your device, and click Back Up Now. This creates a full encrypted backup including Health data.
If the screen is completely unresponsive and the device has never been trusted on your computer, a wired backup is not possible. In that case, proceed with the understanding that a restore may erase unsynced data.
Recovery Mode: ordered steps
Force-quit Finder or iTunes, then reopen it.
Connect the iPhone to your computer with an Apple-certified cable.
Enter Recovery Mode (same sequence as a force restart, but hold the final button past the Apple logo until the recovery screen appears).
Finder or iTunes will detect the device in Recovery Mode and offer Update or Restore.
Choose Update first. iOS downloads and reinstalls, typically taking 15–30 minutes. The device restarts automatically on completion.
If Update fails or the device loops back to Recovery Mode, choose Restore. This erases all content.
Data-loss summary: Recovery Mode ‘Update’ preserves data when it completes successfully. Recovery Mode ‘Restore’ and DFU mode both erase the device. Treat any step beyond ‘Update’ as a full wipe.
DFU mode: when and how
DFU mode is appropriate only when Recovery Mode has not resolved the issue and you are confident the problem is software-based. The exact entry sequence differs by model; Apple’s support pages provide the definitive steps. Once in DFU mode, Finder or iTunes will only offer a full restore. The process typically takes 20–45 minutes including the iOS download.
A checklist before you proceed to DFU:
[ ] Force restart attempted.
[ ] Accessories disconnected and screen cleaned.
[ ] iOS update attempted via Settings or computer.
[ ] Recovery Mode ‘Update’ attempted and failed.
[ ] Backup confirmed or accepted as not possible.
If you have ticked all five and the screen is still unresponsive, DFU is the final software option. If it fails too, the fault is hardware.
When should you stop troubleshooting and book a professional repair?
Some faults cannot be fixed with software. Stop troubleshooting and book a repair if any of the following apply.
Visible cracks, chips, or screen separation.
Liquid residue or a triggered liquid contact indicator.
Dead zones that persist after a full DFU restore.
The device will not power on at all.
The screen worked briefly after a restart but failed again within minutes.
A recently replaced screen is the source of the problem.
Apple service vs independent repair shop
Apple Authorised Service (Apple Store Genius Bar or Apple Authorised Service Provider) uses genuine parts and preserves AppleCare coverage. Screen replacements typically take same-day to 3–5 working days depending on model and stock. Costs vary by model; check Apple Support for current UK pricing. If your device is covered by AppleCare+, accidental damage fees apply rather than full out-of-pocket costs.
Independent repair shops such as Rapidrepairsldn often offer faster turnaround and more competitive pricing for screen replacements and diagnostics, particularly for out-of-warranty devices. Turnaround for a straightforward screen swap is typically same-day. Board-level faults take longer, usually 2–5 days, depending on the diagnosis. The key question when choosing an independent repairer is parts quality: ask whether they use OEM-grade or manufacturer-equivalent displays, and whether the repair carries a warranty.
What to bring: proof of purchase if you have AppleCare, your most recent backup confirmation, and your SIM card removed and stored safely. A good repair shop will triage the device in front of you and explain the fault before quoting.
Pro Tip: Ask any repairer whether the replacement display is tested before the phone is sealed. A reputable shop always does this. If they cannot confirm it, that is a warning sign.
Risks of low-quality third-party parts include reduced touch sensitivity, colour inaccuracy, and failure within weeks. On iOS 18 and later, a non-genuine or uncalibrated display may trigger a Parts & Service History notification, which does not affect function but is worth knowing about.
How does a repair shop diagnose an unresponsive touchscreen?
Understanding what a technician actually does helps you set realistic expectations for time and cost.
Diagnostic steps a technician runs
Visual inspection: check for cracks, screen lift, swelling, and liquid contact indicators under magnification.
Connector test: reseat the display connector and, on older models, the home-button flex cable to rule out a loose connection.
Known-good display swap: connect a confirmed-working display to isolate whether the fault is in the screen assembly or the logic board.
Logic board checks: if a known-good display does not restore touch, the fault is on the board, typically a damaged touch IC or corroded connector pads.
Moisture test: inspect under UV light for corrosion trails from liquid ingress.
iFixit’s troubleshooting documentation lists bent connectors, liquid residue, and logic-board faults as the primary hardware causes, which aligns with what technicians see in practice.
Common causes, difficulty, and cost at a glance
Cause | Type | Shop diagnosis time | Data-loss risk | Typical cost band |
Software freeze / update bug | Software | 5–10 min | None (force restart) | Free (DIY) |
Dirty or wet screen | Physical | 2–5 min | None | Free (DIY) |
Cracked digitiser / display | Hardware | 15–30 min | Low | £80+ (model-dependent) |
Loose display connector | Hardware | 20–30 min | Low | £30–£60 labour |
Water damage (display level) | Hardware | 30–60 min | Medium | £60–£120 |
Logic board / touch IC fault | Hardware | 1–3 days | High without backup | £100+ |
Swollen battery pressing display | Hardware | 30–60 min | Low | £50–£80 |
Cost bands are indicative for the UK market and vary by iPhone model and parts grade.
Parts pairing and calibration
As of iOS 18, Apple’s Repair Assistant and Parts & Service History may be required to complete calibration after a genuine or high-quality display replacement. This is a shop-level process that requires a Mac running Apple Configurator 2 or an authorised diagnostic tool. It does not affect basic touch function on most third-party displays, but True Tone and some brightness features may be limited without it.
Pro Tip: A good technician always tests a replacement display before applying permanent adhesive. If the new screen has a fault, catching it at that stage saves both time and cost.
For related display faults, the Rapidrepairsldn guide on iPhone dead pixel repair explains how technicians decide between a panel swap and board-level work.
Key takeaways
A force restart is the single most effective first step for an unresponsive iPhone touchscreen, resolving the issue in roughly 60% of post-update cases and carrying no data-loss risk; only move to software restores or professional repair after exhausting no-risk options.
Point | Details |
Force restart first | Resolves the issue in roughly 60% of post-update cases; takes under a minute with no data loss. |
Clean and disconnect | Remove accessories, case, and screen protector; wipe with a dry microfibre cloth before any software steps. |
Recovery Mode ‘Update’ | Reinstalls iOS without erasing data when it completes successfully; choose ‘Restore’ only if Update fails. |
DFU is a last resort | DFU mode almost always erases the device; confirm all no-data-loss steps are exhausted before using it. |
Rapidrepairsldn | Offers same-day iPhone screen replacement and board-level diagnostics in London, with parts tested before sealing. |
What the repair bench actually tells us about unresponsive iPhones
The most common pattern seen at Rapidrepairsldn is a post-update freeze that clears with a force restart. Many customers arrive convinced their screen has physically failed, when the device simply got stuck mid-update and the touch driver never completed its handoff. A one-minute restart fixes it.
The second most common cause is moisture, and it is often underestimated. A phone that got briefly wet in the rain, was used with damp hands, or sat in a humid bathroom for months can develop corrosion on the display connector that only becomes apparent weeks later. By the time the screen stops responding, the damage is internal and invisible from the outside.
The third pattern worth knowing: a recently replaced screen from a low-quality supplier. If your touchscreen became unresponsive shortly after a repair elsewhere, the replacement panel is the first thing a technician will check. Parts quality varies enormously, and a failing digitiser layer in a cheap screen can mimic a logic-board fault convincingly.
Board-level faults are real but less common than people fear. When they do occur, they are usually traceable to liquid ingress that was not treated promptly. The outcome depends heavily on how quickly the device was dried and whether corrosion has spread to the touch IC. Early intervention genuinely improves the odds.
Rapidrepairsldn: professional iPhone repair in London
When the DIY steps have not worked, or you would rather have a technician handle it from the start, Rapidrepairsldn offers a straightforward repair service with no unnecessary waiting around.
The iPhone repair service covers screen replacement, water-damage assessment, battery replacement, charging port repair, and component-level board diagnostics. Most screen replacements are completed the same day. Board-level faults are quoted after a diagnostic, which typically takes 30–60 minutes. Every replacement display is tested before the phone is sealed, and repairs come with a warranty on parts and labour. Drop in or book online to get your device looked at.
Useful sources and further reading
Apple Support: if the screen isn’t working on your iPhone or iPad — Apple’s official first-steps guidance, including accessory disconnection and restart.
iFixit: iPhone touchscreen not working — stepwise hardware diagnostics covering connectors, liquid residue, and logic-board faults.
iFixit: iPhone 14 Pro screen replacement guide — repair-bench notes on test-before-seal practices and Repair Assistant calibration.
Swappie: fixing touchscreen problems on the latest iPhones — practical cleaning, drying, and screen-protector guidance.
Rapidrepairsldn: iPhone keeps restarting fix — force restart and Recovery Mode steps for related reboot-loop symptoms.
Rapidrepairsldn: what causes iPhone ghost touch — technician-level explanation of erratic touch input and common hardware causes.
Rapidrepairsldn: why your iPhone freezes randomly — root causes for freezing and unresponsiveness, with software and hardware breakdowns.
Rapidrepairsldn: iPhone cracked screen temporary fixes — practical measures for cracked screens and when to book a prompt repair.
This article is general information, not professional advice. For your specific device and situation, check Apple’s current support pages or speak to a qualified repair technician.
Recommended
Comments