
Electronics repair shop tips: prepare your device safely
- a few seconds ago
- 8 min read

Before you hand over your phone, tablet or laptop for repair, do five things: back up your data, remove your SIM and any memory cards, disable Find My (iPhone) or document your Factory Reset Protection status (Android), hide or remove your screen lock if the shop needs to run tests, and bring your charger, photo ID and proof of purchase. That covers the core of any solid electronics repair shop checklist, and everything below expands each step with platform-specific instructions.
Quick pre-repair checklist (screenshot this before you go):
Back up all data to iCloud, Google Drive, or an external drive
Remove SIM card, microSD card, and any removable storage
Disable Find My (Apple) or note your Google account for FRP (Android)
Hide notifications or remove screen lock if diagnostics are needed
Pack charger, cables, photo ID and proof of purchase
Photograph the device’s condition before handing it over
Table of Contents
What should you remove and bring to your repair appointment?
Should you disable Find My and other anti-theft locks before repair?
What questions should you ask the repair shop before handing over your device?
What should you check when you collect your device after repair?
When should you factory-reset your device yourself before repair?
Why repair shops ask for these things — and what Rapidrepairsldn does differently
How do you back up your device before a repair appointment?
Backup is the single most important step. Repair centres sometimes need to reinstall software, replace storage, or perform a factory reset, and Dell’s mail-in guidance states plainly that manufacturers are not responsible for lost or corrupted data during service.
iPhone and iPad: Go to Settings > [your name] > iCloud > iCloud Backup and tap Back Up Now. Alternatively, connect to a Mac or PC and use Finder (macOS Catalina and later) or iTunes to create a local backup. Apple’s own support guidance recommends completing a backup before any service appointment.
Android phones: Open Settings > Google > Backup and confirm the toggle is on, then tap Back Up Now. Also copy photos manually to Google Photos or to a PC via USB. If your screen is cracked and unresponsive, an OTG (On-The-Go) cable lets you connect a USB drive directly to the phone to pull files before you go in.
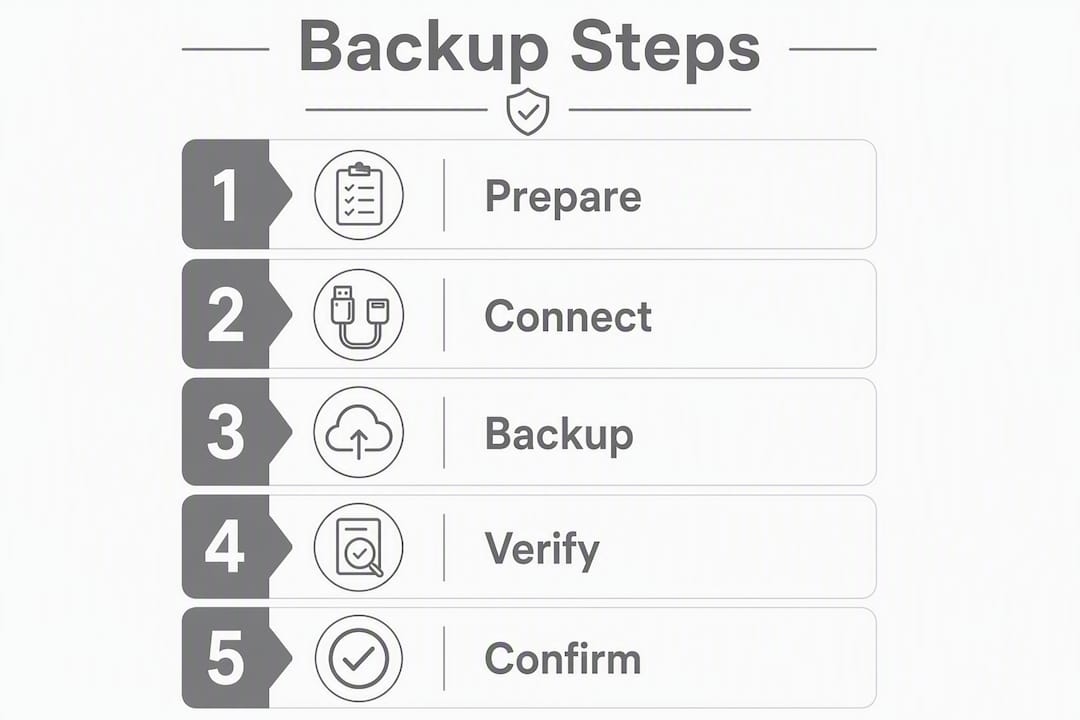
Windows laptops: Use File History (Settings > Update & Security > Backup) or copy your Documents, Desktop and Pictures folders to an external drive. If BitLocker encryption is active, write down your recovery key from Control Panel > BitLocker Drive Encryption and store it somewhere safe, separate from the device.
Mac: Run a Time Machine backup to an external drive, or use iCloud Drive to sync key folders. If FileVault is on, note your recovery key from System Settings > Privacy & Security > FileVault.
If the device won’t turn on: Tell the shop that data recovery is the priority before any repair attempt. A good technician will try to image the drive first rather than proceed with risky work that could overwrite it.
Pro Tip: Create a folder on your desktop called “Repair Info” containing your name, contact number, and any temporary passcodes you agree to share with the shop. It takes two minutes and removes ambiguity on both sides.
What should you remove and bring to your repair appointment?
What to remove from the device
SIM card and SIM ejector tool (keep both with you)
microSD or any removable memory card
Phone case, screen protector, and any attached accessories
Removable external drives or USB dongles on laptops
What to bring with you
Charger and relevant cables (USB-C, Lightning, MagSafe)
Original box if you have it (useful for model identification)
Proof of purchase or warranty documentation
Photo ID
Photos or a short video showing the fault and any existing damage
IMEI or serial number noted separately (find it in Settings > General > About on iPhone, or on the original box)
Pro Tip: Take a 30-second video of the device before you leave home. Pan slowly around all four edges, show the screen, and note any pre-existing scratches or dents aloud. This protects you if a dispute arises about damage that was already there.
Documenting condition with photos is also recommended by independent repair guidance as a straightforward way to create an evidence trail if parts are swapped or new damage appears.

Should you disable Find My and other anti-theft locks before repair?
The direct answer: disable anti-theft locks when the shop needs to run full device tests, but keep your screen lock in place for simple hardware jobs where the technician has no reason to access your data.
Apple devices: Go to Settings > [your name] > Find My > Find My iPhone and toggle it off. You will need your Apple ID password. Apple Support recommends this step before sending a device for service. For in-person screen or battery repairs, it is often not required, but confirm with the shop beforehand.
Android devices: Factory Reset Protection (FRP) ties the device to your Google account. If the shop needs to perform a factory reset, you will need to remove your Google account first via Settings > Accounts > Google > Remove Account. For hardware-only repairs, this is rarely necessary.
For straightforward fixes like screen replacements or battery swaps, research into repair shop privacy confirms that technicians generally do not need your main login. If a shop asks for your primary account password, ask why and request that any diagnostics requiring login be run in your presence.
Never share two-factor authentication codes. If a shop needs temporary access, create a guest account or a secondary local user profile on a laptop rather than handing over your main credentials. Tekbits’ guidance on laptop preparation recommends creating a dedicated “Repair” account with limited permissions.
Pro Tip: Screenshot your current security settings before changing anything. That way you can restore them exactly as they were once the repair is complete.
Disable Find My only when the shop confirms it is required
Never share your main Apple ID or Google account password
Use a guest or repair account on laptops where possible
Re-enable all security features as soon as you collect the device
What questions should you ask the repair shop before handing over your device?
Asking a few direct questions at drop-off takes under two minutes and tells you a great deal about how a shop operates. The ICO’s data security guidance recommends checking access controls and staff permissions when handing personal data to any third party.
Questions to ask:
Do you provide a written intake form with the serial or IMEI number?
Who will physically handle my device, and where is it stored overnight?
Will you need any of my account passwords or login credentials?
What parts will you use — original manufacturer parts or third-party?
What warranty do you offer on the repair?
What is your policy on customer data if a reset is required?
Red flags to watch for: a shop that refuses to give a written receipt or estimate, insists on your main account credentials without a clear reason, gives vague answers about parts or warranty, or pressures you to leave the device without logging it in. For more on spotting iPhone repair scams, Rapidrepairsldn has a dedicated guide worth reading before your appointment.
What should you check when you collect your device after repair?
Test these functions before you leave the shop, while the technician is still available:
Screen: check for dead pixels, colour accuracy and touch responsiveness across the full display
Charging: plug in and confirm the device charges
Speakers and microphone: play audio and make a brief test call
Camera: open the camera app and check front and rear lenses
Wi-Fi and mobile data: connect to a network and confirm connectivity
Administrative checks: ask for a written receipt that includes the serial or IMEI number, a list of parts replaced, the diagnostics performed, and the technician’s name. A clear retention policy for your data should also be stated. Repair intake guidance consistently identifies a signed intake form as the baseline standard for reputable shops.
If the repair required a reset or any data access, ask for a written note confirming what was done and what credentials were used temporarily.
Pro Tip: If you notice any new user accounts, unfamiliar apps, or unexpected changes to settings, do not leave. Ask for an explanation on the spot. If you are not satisfied, take the device home and run a full security check — change your primary passwords, review connected accounts, and run a malware scan.
When should you factory-reset your device yourself before repair?
Reset yourself when:
You are sending the device by post or using a mail-in service
You cannot verify the shop’s access controls or overnight storage policy
The repair is purely physical (cracked glass, battery) and diagnostics are not needed
Do not reset when:
The device is non-functional and the technician needs to inspect software logs or boot the device to diagnose the fault
Data recovery is part of the repair — a reset will destroy what you are trying to save
The shop has confirmed they will erase the device in front of you after work is complete
Kaspersky’s repair privacy guidance recommends a full backup and erasure where practical, but notes that in-person repairs with the customer present are the safer alternative when erasure is not possible. If BitLocker or FileVault is active, store the recovery key somewhere separate from the device before any reset.
Key takeaways
Preparing your device before a repair appointment protects your data, speeds up the process, and gives you a clear evidence trail if anything goes wrong.
Point | Details |
Back up before anything else | Use iCloud, Google Drive, Time Machine, or File History before your appointment. |
Remove SIM and memory cards | Take out your SIM, microSD, and any removable storage before handing over the device. |
Disable anti-theft locks carefully | Turn off Find My or remove your Google account only when the shop confirms it is required. |
Document condition with photos | A short video of the device before drop-off protects you if a damage dispute arises. |
Rapidrepairsldn provides written intake | Rapidrepairsldn logs serial numbers, issues a written estimate, and documents parts used on every repair. |
Why repair shops ask for these things — and what Rapidrepairsldn does differently
From an operational standpoint, shops ask for serial numbers and IMEI records because they need to match replacement parts to the exact model variant, verify warranty status, and create a paper trail that protects both the customer and the business. Asking to disable Find My is not about accessing your data; it is about being able to test the device fully after the repair without an activation lock blocking the process.
At Rapidrepairsldn, every device that comes in is logged with a signed intake form recording the serial or IMEI, the reported fault, and a written estimate before any work begins. Devices are stored securely overnight and access is limited to the technician assigned to the job. Rapidrepairsldn also offers component-level motherboard diagnostics that many shops cannot perform, which means faults can often be identified without wholesale component replacement and without needing broad access to your data.
If any shop’s intake process feels unclear, ask to see the form, ask for diagnostics to be run in your presence, or choose a shop that will provide the paperwork. You are entitled to ask, and a reputable shop will not hesitate to show you.
Rapidrepairsldn: trusted local repairs in north London
Rapidrepairsldn serves north London residents across Finchley, Finsbury Park, Archway, Islington and beyond, with in-person repairs for iPhones, iPads, Samsung devices, MacBooks and Windows laptops. Every repair comes with a written intake form, documented serial numbers, authorised or clearly labelled parts, and a post-repair verification step before you leave.
Bring the checklist from this article to your appointment. Book your iPhone repair or laptop repair online, or visit the Rapidrepairsldn homepage to check availability and get in touch directly.
The part of repair prep most people skip
Most guides focus on the backup step and stop there. The part that actually catches people out is the post-repair check. Customers collect a device, glance at the screen, and leave. Three days later they notice an unfamiliar app, a drained battery, or a setting that has been changed. By then, proving what happened is much harder.
The intake form and the on-collection test are not bureaucratic formalities. They are the only objective record of what the device looked like before and after. A shop that resists providing either is telling you something important about how it operates.
The privacy risk in device repair is real, but it is also manageable. The steps in this article take less than an hour for most devices. That hour is worth it.
Recommended