
What to do when your cell phone gets wet
- 1 day ago
- 13 min read
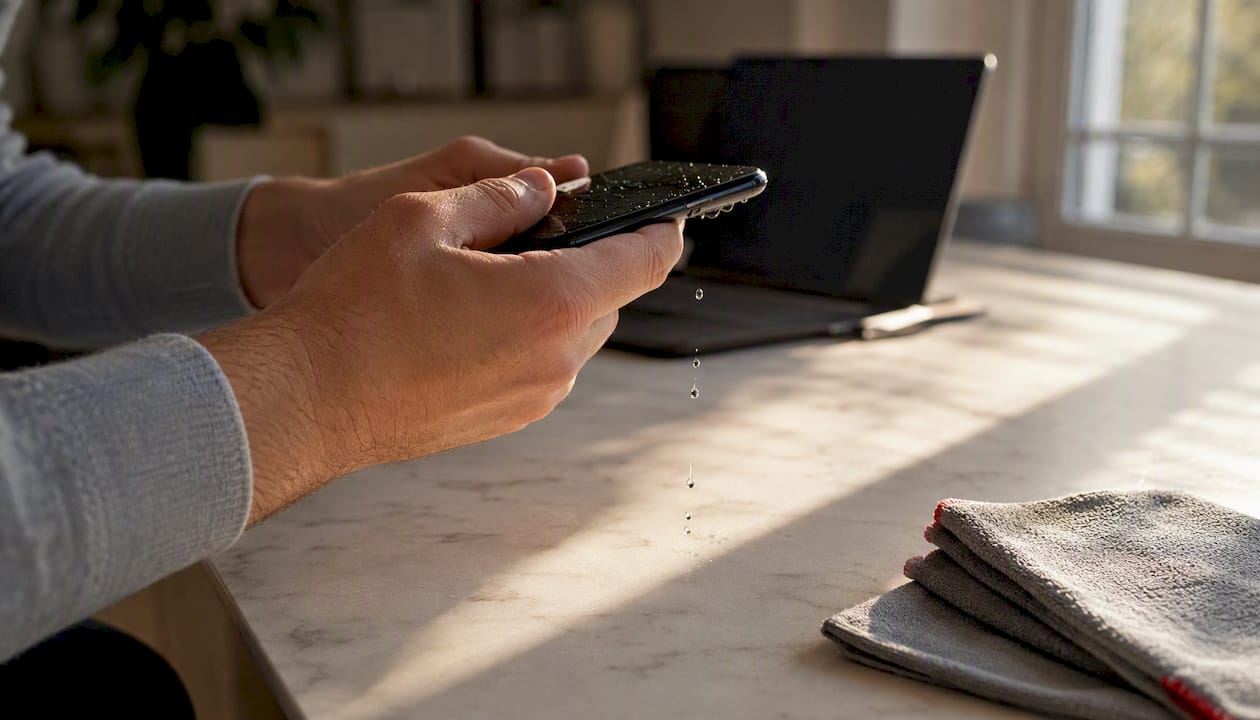
If your phone just got wet, act fast: power it off immediately, remove the case and SIM tray, gently pat the exterior dry with a lint-free cloth, and leave it to dry for at least 24 hours before you try switching it back on. That single sequence, done in the first 60 seconds, gives your device the best chance of recovery.
The primary short-term threat after immersion is electrical current causing short-circuits and rapid electrochemical corrosion on the circuit board. Every second the phone stays powered on while wet increases that damage.
Quick emergency checklist:
Power off the phone right now, even if it looks fine
Remove the case, back cover, and SIM/microSD tray
Take out the battery if your model allows it
Gently pat the exterior dry with a microfibre cloth
Hold the phone port-side down and tap gently to dislodge surface water
Do NOT plug it in, press buttons repeatedly, or try to charge it
Do NOT use a hairdryer, oven, or any heat source
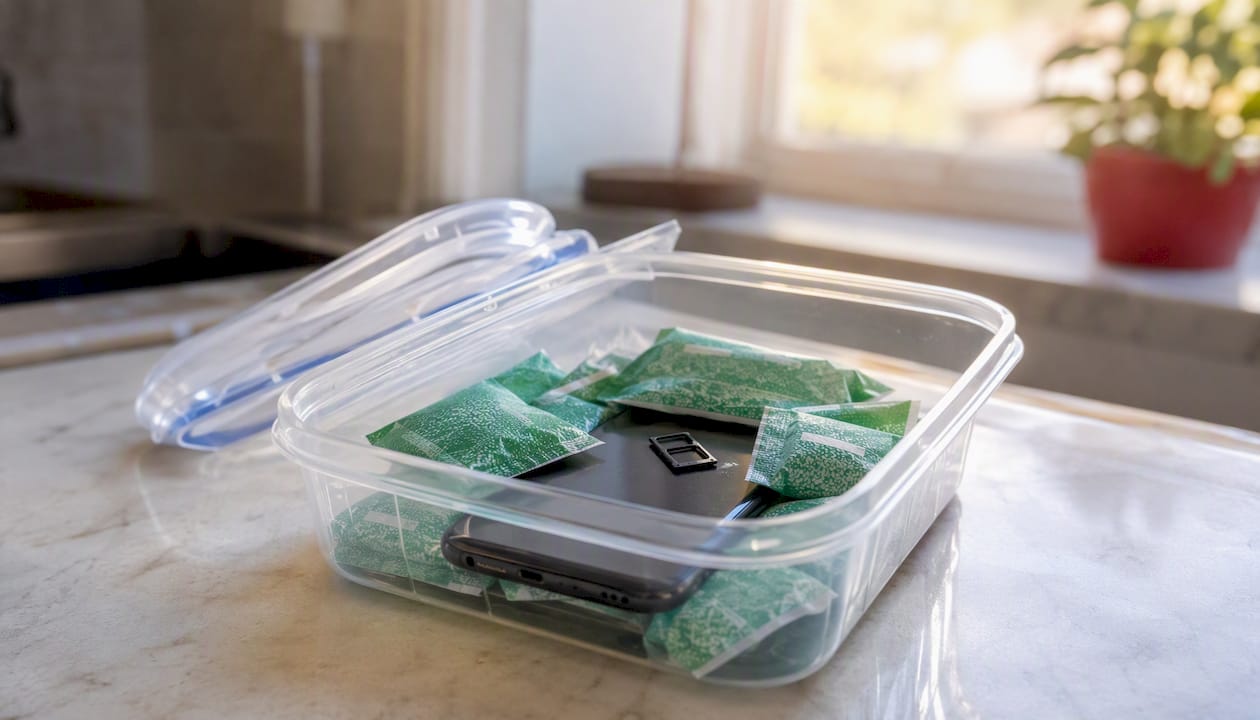
Place it in a dry, ventilated spot or a sealed container with silica gel
Safety first: A wet lithium-ion battery can overheat, swell, or in rare cases ignite if exposed to electrical current or heat. If you notice the battery bulging, the phone feeling unusually warm, or a burning smell, do not attempt to charge it. Place the device on a non-flammable surface and away from anything combustible.
Key takeaways
Powering off a wet phone immediately and keeping it off for at least 24–48 hours is the single most important step to give your device a realistic chance of recovery.
Point | Details |
Power off without delay | Switch off immediately and do not power on again until fully dry — electrical current causes rapid corrosion. |
Remove case, SIM, and battery | Strip the phone down as far as possible to allow airflow and reduce trapped moisture. |
Skip rice and heat | Rice leaves residue and blocks ports; heat damages the battery and adhesives — use silica gel or airflow instead. |
Wait 24–72 hours | The minimum safe wait before powering on is 24 hours with desiccant and 48 hours with air drying |
Rapidrepairsldn for professional repair | If the phone will not boot, shows swelling, or has visible corrosion, bring it to Rapidrepairsldn in north London for a component-level diagnostic. |
Table of Contents
What should you do in the first 60 seconds?
Speed matters more than anything else here. The steps below are in order of priority.
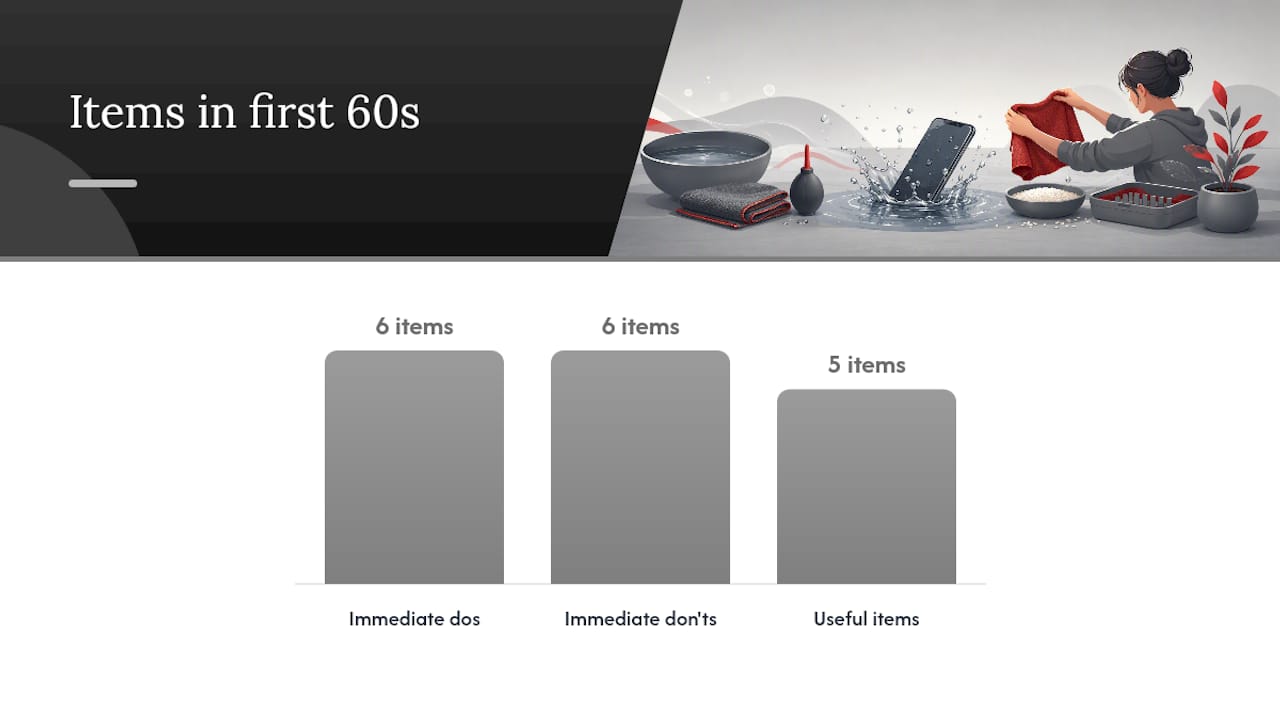
Do these immediately:
Remove the phone from water without delay
Hold the power button and switch it off completely
Pull off the case
Eject the SIM card tray and microSD card using the ejector tool or a straightened paperclip
Remove the battery if your model has a removable one (most modern smartphones do not)
Gently pat the exterior with a microfibre cloth, working around ports and buttons
Do not do any of the following:
Power the phone back on to “check if it’s working”
Plug it into a charger or a computer
Press buttons or the home key repeatedly
Blow into the charging port or speaker grilles with your mouth or compressed air
Use a hairdryer, fan heater, or put it in an oven or microwave
Shake the device vigorously (this drives water deeper into the internals)
Repair technicians consistently flag the same mistake: the most common reason a recoverable phone becomes unrecoverable is the owner powering it back on within minutes of getting it wet. Resist the urge to check whether it still works.
Useful items to have on hand:
Microfibre cloth or lint-free cloth
SIM ejector tool or a straightened paperclip
Airtight food-storage container or zip-lock bag
Silica gel packets (the small sachets that come in shoe boxes or electronics packaging)
Tweezers for handling the SIM tray
Pro Tip: Keep a small zip-lock bag and a handful of silica gel packets in your home or bag. If your phone gets wet, you can seal it in the bag with the packets within minutes of the incident, which is far more effective than any last-minute improvisation.
A practical hour-by-hour rescue timeline
Following a clear timeline removes the guesswork and reduces the risk of making things worse.
0–1 hour: immediate triage
Get the phone out of the water, power it off, and complete the checklist above. If the phone was submerged in saltwater, pool water, or soapy liquid, you need to rinse it gently with clean tap water before drying (see the rinsing section below). For a brief splash of plain fresh water, skip the rinse and go straight to drying.
Once the exterior is patted dry, hold the phone with the charging port facing downward and tap it gently against your palm a few times. This helps dislodge water sitting in the port without forcing it further inside.
1–6 hours: safe exterior drying and SIM/storage salvage
Lay the phone on a dry microfibre cloth in a well-ventilated room. Leave the SIM tray out so air can circulate through that opening. If you have silica gel packets available, place the phone and several packets inside an airtight container and seal it. The packets draw moisture from the air around the device, lowering the humidity inside the container.
Your SIM card and microSD card are usually fine after a brief exposure to water. Dry them with a cloth and leave them out of the phone for now.
6–48 hours: desiccant method or airflow method
Keep the phone sealed with silica gel or in a dry, ventilated spot for a minimum of 24 hours, ideally 48. Manufacturers suggest leaving devices to air-dry for at least 24 hours before attempting to power on.
Signs that DIY is not working and you need professional help:
The phone feels warm or hot even when powered off
The battery appears to be swelling or the back cover is lifting
You see visible corrosion or white residue around ports or connectors
The phone powers on but immediately shuts down, glitches, or shows a “liquid detected” alert
For saltwater or pool water exposure, follow the rinse protocol first, then use the desiccant method. For plain fresh water, airflow or desiccant both work. According to Android Authority’s repair guide, the consistent recommendation across repair professionals is: retrieve, power off, remove trays, pat dry, tap port-down, then place in a ventilated area or sealed desiccant pod.
How to dry a wet phone safely: what works and what doesn’t
The drying method you choose has a direct impact on whether your phone recovers. Here is how the main options compare.
Method | How it works | Verdict |
Air drying with airflow | Phone left in ventilated room, port-down | Safe and effective for light exposure; slow for deeper moisture |
Sealed desiccant (silica gel) | Airtight container with silica gel packets | Best DIY method; draws moisture from internal crevices effectively |
Professional vacuum/low-pressure drying | Shop equipment evaporates moisture at low temperature | Most effective; not possible at home |
Rice | Absorbs some surface humidity | Unreliable and potentially harmful |
Hairdryer or heat source | Applies direct heat to dry moisture | Dangerous; avoid entirely |
Rice is not a reliable drying method and can leave starch and dust that create sticky residues and block ports. Apple and Samsung have both explicitly warned against it. Silica gel in a sealed container is the better choice because it actively lowers the humidity around the device rather than simply absorbing surface moisture.
Heat is the other major risk. Lithium-ion batteries are sensitive to temperature, and a hairdryer or oven can warp internal adhesives, damage the display, and in the worst cases cause the battery to swell or vent. Repair technicians advise against heat and vigorous drying methods; cool, passive airflow and trained cleaning are the safe approaches. If you are concerned about heat risks to your device more broadly, the guide on phone overheating explains what temperatures do to internal components.
From repair technicians: “The phone’s own battery is the enemy after a water incident. It keeps current flowing through wet circuits. Cut the power, remove the battery if you can, and let the device dry passively. Heat does not speed recovery — it accelerates failure.”
Pro Tip: Collect the small silica gel sachets that come inside shoe boxes, handbag packaging, and electronics. Store them in a sealed jar. When you need them, they are ready to use. If they have been sitting open for a while, place them in an oven at 80°C for an hour to reactivate them before use.
When should you rinse a phone after saltwater or pool exposure?
Rinsing sounds counterintuitive, but for certain liquids it is the right call. If exposed to saltwater, chlorinated pool water, or soapy liquids, rinse gently with clean tap water before drying, because impurities accelerate corrosion.
Salt, chlorine, and soap residues conduct electricity and chemically attack the metal contacts and circuit board traces inside the phone. Leaving them in place while the phone dries locks in the damage. A gentle rinse with clean tap water dilutes and removes those contaminants before they can cause further harm.
How to rinse correctly:
Hold the phone under a gentle stream of clean tap water for 10–15 seconds
Keep the flow light — do not submerge the phone or use a pressure tap
Tilt the phone so water runs away from ports rather than into them
Immediately pat the exterior dry with a lint-free cloth
Tap the phone gently with the port facing down to dislodge surface water
Transfer straight to your chosen drying method (sealed desiccant or airflow)
Important: This rinsing step applies only to saltwater, pool water, and soapy liquid exposure. If your phone had a brief splash of plain tap water or fell into a fresh-water puddle, skip the rinse entirely and go straight to drying. Rinsing a phone that only touched clean fresh water adds unnecessary moisture.
Dissolved salts and chlorides conduct electricity and chemically attack metals on circuit boards, which is why seawater causes faster, more severe corrosion than fresh water. IP ratings, which measure water resistance, are tested in controlled fresh water only — they offer no guarantee against saltwater or pool exposure.
How long should you wait before powering on?
Patience is one of the most effective tools you have. Powering on too early is the single most common reason a phone that could have been saved ends up permanently damaged.
Suggested minimum wait times:
Drying method used | Minimum wait | Recommended next step |
Air drying only | 48 hours | Try powering on; take to shop if issues appear |
Sealed desiccant (silica gel) | 24–48 hours | Try powering on; monitor closely |
No drying method used | 72 hours | Take to a repair shop before attempting to power on |
Saltwater/pool exposure | 72 hours after rinse and desiccant | Professional inspection recommended before powering on |
Once you have waited the appropriate time, run through this checklist before and after powering on:
Visual inspection: Look for moisture under the screen, white residue around ports, or any visible corrosion
Charging port: Check for debris, residue, or discolouration before plugging anything in
Screen: Check for dead pixels, discolouration, or flickering
Speaker and microphone: Make a call or play audio to test both
Camera: Open the camera app and check for condensation behind the lens
Wireless radios: Test Wi-Fi, Bluetooth, and mobile signal
Charging behaviour: Plug in only after the phone has powered on normally; watch for unusual heat or a “liquid detected” warning
If the phone shows any of these signs after powering on, switch it off again immediately and take it to a repair shop. Persistent glitches, unexpected shutdowns, or a “moisture detected” alert all indicate that water is still present or that corrosion has begun.
When should you stop DIY and see a professional?
Some water damage is beyond what passive drying can fix. Knowing when to stop saves you time and protects your data.
Take the phone to a repair shop if you notice any of the following:
The battery is visibly swollen or the back cover is lifting
The phone will not boot after the recommended drying period
It powers on but shuts down immediately or behaves erratically
There is a persistent “liquid detected” or “moisture in port” alert
You can see white or green residue around connectors or ports
The phone is warm or hot while powered off
You dropped it in saltwater and it was submerged for more than a few seconds
What to bring to the shop:
The SIM card (removed and dried)
Proof of purchase if you plan to discuss warranty or insurance
Your phone insurance details if you have accidental-damage cover
A clear description of the incident: what liquid, how long submerged, what you have done since
Questions worth asking the technician:
Can you run a full diagnostic before I commit to a repair?
Is there visible corrosion on the board?
What are my data-recovery options if the phone cannot be repaired?
What is the likely cost range and turnaround time?
Do you need my consent before accessing data for recovery purposes?
If data recovery is a priority, read about phone data recovery services before your visit so you know what to expect. For a broader look at warning signs that indicate serious faults, the signs your iPhone needs repair guide covers the most common indicators.
What do professionals actually do with a water-damaged phone?
Understanding the shop process helps you set realistic expectations and ask the right questions.
Typical repair workflow:
Visual inspection: The technician checks the exterior for damage, residue, and the liquid contact indicator (a small white or red sticker inside the SIM tray slot that changes colour on contact with water)
Non-destructive disassembly: The phone is carefully opened to expose the mainboard and battery
Moisture and corrosion assessment: The board is inspected under magnification for moisture, oxidation, and corrosion deposits
Isopropyl alcohol cleaning: The board and connectors are cleaned with high-concentration isopropyl alcohol to remove mineral deposits and halt active corrosion
Low-pressure drying: Professional shops use vacuum or low-pressure drying equipment to evaporate internal moisture at temperatures that do not damage components
Component-level testing: Each major component — display, battery, charging circuit, cameras, radios — is tested individually
Board-level repair if needed: In severe cases, a technician may reflow solder joints or replace corroded components at the board level
Realistic outcomes:
Full recovery: The phone is cleaned, dried, and returned to normal service. This is the most common outcome for phones brought in quickly after a fresh-water incident.
Partial recovery with component replacement: The board survives but a component (battery, charging port, display) needs replacing. Costs vary by model and part.
Data recovery only: In severe corrosion cases, the phone may not be repairable, but data can often still be extracted. This is why regular backups matter so much.
For a detailed look at what board-level repair involves and what it costs, the phone motherboard repair cost guide gives realistic UK price ranges.
Pro Tip: Ask the technician to show you the liquid contact indicator result and any photos taken during disassembly. A reputable shop will document the condition of the board before and after cleaning — this protects both you and them.
How can you prevent water damage in the future?
Prevention is far cheaper than repair. A few straightforward habits reduce the risk significantly.
Understanding IP ratings
IP (Ingress Protection) ratings tell you how resistant a device is to dust and water under controlled test conditions. IP67 means the device is rated to withstand submersion in fresh water under controlled conditions. IP68 indicates a higher level of protection, with exact depths and times varying by manufacturer.
The critical caveat: manufacturers’ water-resistance tests are conducted in controlled fresh water, not in seawater, pool water, or under pressure from waves. An IP68-rated phone is not waterproof in the everyday sense, and the seals degrade over time with normal wear and drops.
What IP ratings do not cover: saltwater, chlorinated pool water, pressurised water (showers, taps), and older devices whose seals have worn. Treat an IP rating as a safety margin, not a guarantee.
Practical prevention steps
Use a waterproof pouch or dry bag near water (beaches, pools, boats, bathrooms)
Choose a water-resistant case with sealed port covers for outdoor activities
Keep a few silica gel packets in your bag or bedside drawer for quick response
Back up your phone regularly to iCloud, Google One, or a local computer — physical recovery is not guaranteed, and data-recovery firms report rising calls after water incidents
Avoid using your phone in the bathroom, near sinks, or in heavy rain without protection
Insurance and warranty in the UK
Standard manufacturer warranties (including Apple’s one-year limited warranty and Samsung’s equivalent) typically exclude liquid damage. If your phone is damaged by water, you are unlikely to receive a free repair or replacement under the standard warranty alone.
Separate accidental-damage cover, either through your home contents insurance or a dedicated phone insurance policy, commonly includes liquid damage. Check your policy’s excess carefully — on budget policies, the excess can approach or exceed the cost of a repair. Some network providers in the UK offer add-on insurance that covers accidental damage; compare the annual premium against the likely repair cost for your specific model before committing.
A technician’s perspective on what actually matters
The advice that circulates online about wet phones tends to focus on the dramatic: will rice save it, will a hairdryer work, is it completely dead? In practice, the phones that recover well share one thing in common — the owner did very little after powering off. They did not press buttons, did not try to charge it, and did not apply heat. They just waited.
The instinct to act is understandable. Your phone holds your contacts, photos, banking apps, and work emails. The urge to check whether it still works is strong. But every button press on a wet device sends current through circuits that are still damp, and every second of that current accelerates corrosion. The phones that arrive at a shop in the worst condition are almost always the ones that were powered on repeatedly in the hours after the incident.
The other thing worth saying plainly: IP ratings give people a false sense of security. A phone rated IP68 is tested in a lab, in still fresh water, at a controlled depth, for a fixed time. That is not the same as a wave at the beach, a drop into a chlorinated pool, or a phone that has been dropped twice and has a hairline crack in its seal. Treat the rating as a buffer, not a guarantee, and act as if any water exposure is a potential emergency.
If you are unsure whether your phone has recovered fully, a diagnostic inspection at a repair shop costs far less than a replacement. The technician can check the board for corrosion that is invisible from the outside and catch problems before they develop into permanent faults.
Rapid Repairs London: professional water damage diagnostics in north London
When drying and waiting is not enough, Rapidrepairsldn offers component-level water damage diagnostics and repair at our north London shop. We open the device, inspect the board under magnification, clean corrosion deposits with isopropyl alcohol, and test every major component before we give you a clear, honest assessment of what is recoverable.
Pricing is transparent: you know the cost before any repair work begins. We handle iPhone water damage repair and tablet liquid damage repairs across all major brands, and our technicians follow strict data-safety practices throughout. If the device cannot be repaired, we can discuss data-recovery options with you directly.
Drop in or book a diagnostic at Rapidrepairsldn and let us take a look before the damage goes any further.
Sources
The guidance in this article draws on manufacturer support pages and repair-expert resources. For model-specific advice, always check your device maker’s official support page directly.
Recommended
Comments