
What is component-level repair: a practical guide
- 3 days ago
- 8 min read
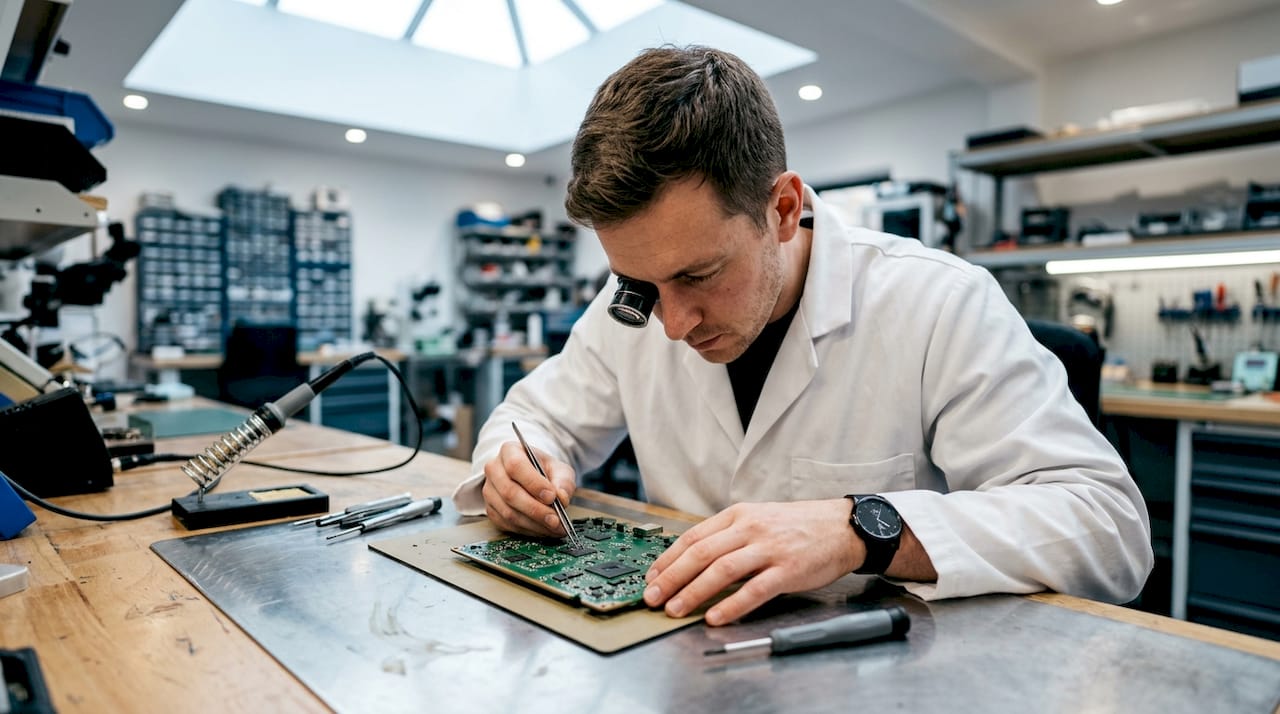
Component-level repair is the targeted diagnosis and replacement of individual electronic components on a circuit board, without discarding the whole assembly. Rather than swapping out an entire motherboard or logic board, a technician identifies the specific resistor, capacitor, integrated circuit, or other part that has failed and fixes only that. This approach requires specialised tools such as soldering stations, hot-air rework stations, and flux, alongside a methodical process. The benefits are real: you preserve your data, avoid unnecessary waste, and typically spend far less than a full board replacement would cost.
What is component-level repair and how does it work?
Component-level repair involves the skilled substitution of discrete parts like resistors, capacitors, diodes, and integrated circuits on intact circuit boards to restore function. Most electronic failures trace back to just a handful of components, which is why a trained technician can often revive a device without touching the rest of the board. The industry term you will also encounter is PCB repair, short for printed circuit board repair. Both phrases describe the same practice.
The standard repair process follows four clear steps:
Root cause diagnosis. The technician uses multimeters, oscilloscopes, and schematics to identify the failed component before touching anything else. Skipping this step leads to replacing the wrong part.
Cleaning. Contamination, corrosion, and old flux residue are removed using Isopropyl Alcohol. A clean board gives you an accurate view of the damage and prevents poor solder joints later.
Component removal and replacement. The faulty part is desoldered and a new one is fitted. The method varies by package type: surface-mount resistors and capacitors come off with a hot-air station, while ball grid array (BGA) chips require specialist infrared rework equipment.
Final testing. The board is powered up and tested under normal operating conditions to confirm the fault is resolved.
Industry guidance for 2026 advises against attempting repair when the board substrate is burnt, when traces are too severely damaged to restore, or when the estimated repair cost exceeds 30–40% of the replacement board price. That threshold exists because beyond it, replacement becomes the more sensible economic choice.
Pro Tip: Always photograph the board before you remove any component. A clear reference image saves you from guessing orientation or polarity when fitting the replacement.
How does component-level repair differ from rework and board replacement?
The terms rework and repair are often used interchangeably, but IPC standards draw a clear line between them. Rework corrects assembly-line defects and returns a board to its original specification. Repair, by contrast, restores a board after service-related damage and often involves permanent modifications that were never part of the original design.
A common example of a repair modification is a jumper wire. When a copper trace is broken, a technician solders a fine wire across the gap to restore continuity. The board works again, but it no longer matches the factory blueprint. Rework would never involve this kind of change.
Understanding this distinction matters because it affects the tools you need, the quality standards you apply, and whether the end result is acceptable for the device’s intended use. PCB repair is a surgical process involving restoration of pads, traces, vias, and substrates damaged in service. That is fundamentally different from correcting a misaligned component fresh off a production line.
Factor | Component-level repair | Full board replacement |
Cost | Significantly lower, often 40–70% less | High, sometimes hundreds to thousands of pounds |
Data risk | Low, original board is retained | High, data may be lost with the old board |
Turnaround | Varies by fault complexity | Faster if a spare board is available |
Environmental impact | Minimal waste, extends device life | Generates electronic waste |
Feasibility | Depends on damage severity and component availability | Always possible if a replacement board exists |
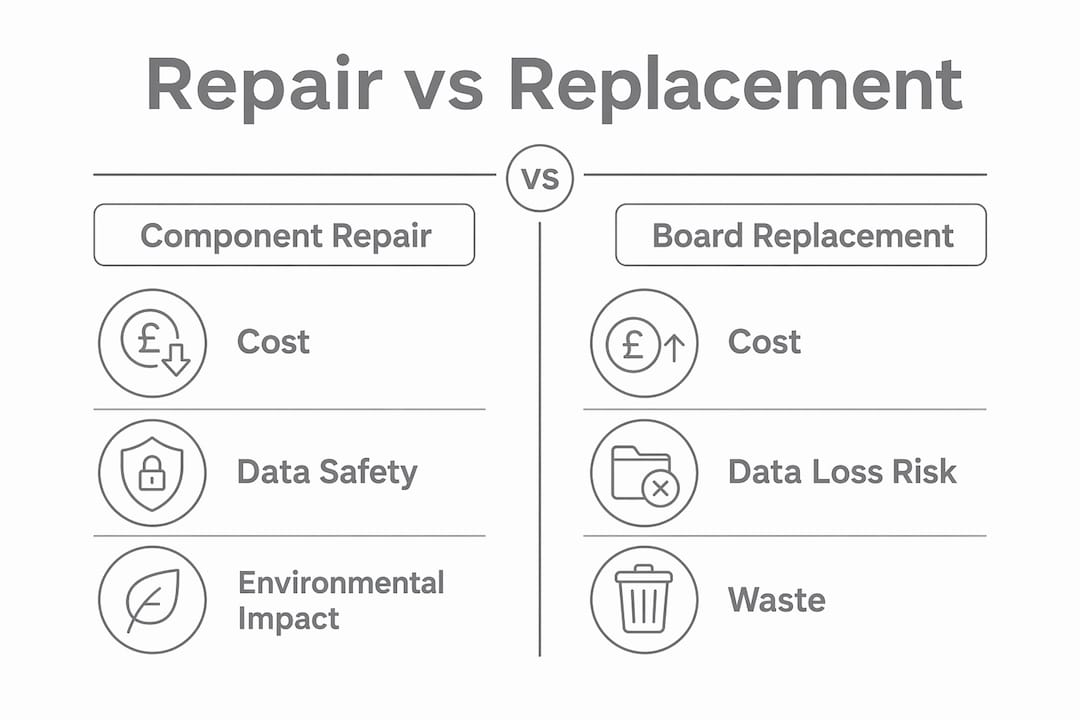
Component-level repair can save 40–70% compared to full board replacement. For many devices, that difference runs into hundreds of pounds.
Essential techniques and common pitfalls in component-level repair
Good component repair technique comes down to two things: thermal control and flux management. Get either wrong and you risk causing more damage than you started with.
Thermal profile control
Successful BGA rework requires a precise thermal profile that includes a soak phase, where the board temperature rises slowly and evenly before the peak heat is applied. This prevents board warping and pad damage that would make the repair irreversible. Preheating the board to 100–150°C before applying localised hot air reduces the risk of thermal shock, substrate warping, and internal delamination. Skipping preheat is one of the most common beginner mistakes.
Flux management and cleaning
Flux management is as important as heat control. Layering fresh flux over charred residue blocks solder wetting and increases the chance of a cold joint or re-failure. Clean the area with Isopropyl Alcohol after every removal step, not just at the end. This gives you a clear surface and accurate visual feedback throughout the process.
Common pitfalls to avoid:
Dry desoldering braid. Using dry braid without flux is the primary cause of torn copper traces. Always apply flux to the braid before use.
Thermal shock from rushing. Applying full heat immediately to a cold board stresses the substrate. Preheat first.
Wrong component polarity. Electrolytic capacitors are polarised. Fitting one backwards causes it to fail immediately, sometimes violently.
Ignoring broken traces. A replaced component will not function if the trace connecting it is cracked. Check continuity with a multimeter after every repair.
Pro Tip: When reflowing a cold solder joint, add a small amount of fresh solder and flux before applying heat. This lowers the melting point and improves flow without requiring excessive temperature.
When to choose component-level repair over board replacement
The decision between repair and replacement is primarily economic, but physical condition and data considerations also play a role. A clear framework helps you make the right call quickly.
Repair is the right choice when:
The fault is isolated to one or two identifiable components
The board substrate is physically intact, with no burnt or delaminated areas
The repair cost stays within 30–40% of the replacement board price
The device holds important data that would be difficult or impossible to recover from a replacement board
The device is out of production and replacement boards are scarce or expensive
Replacement makes more sense when:
Multiple areas of the board are damaged beyond practical restoration
The cost of skilled labour and specialist parts exceeds the economic threshold
A direct replacement board is cheap and readily available
The environmental case for repair is also worth considering. Discarding a circuit board contributes to electronic waste, which is one of the fastest-growing waste streams globally. Repairing a single motherboard instead of replacing it keeps that assembly out of landfill and reduces the demand for new manufacturing. For anyone who cares about the lifespan of their devices, the repair-first approach is the more responsible one. You can read more about repair versus replacement in the Rapidrepairsldn guide dedicated to that decision.
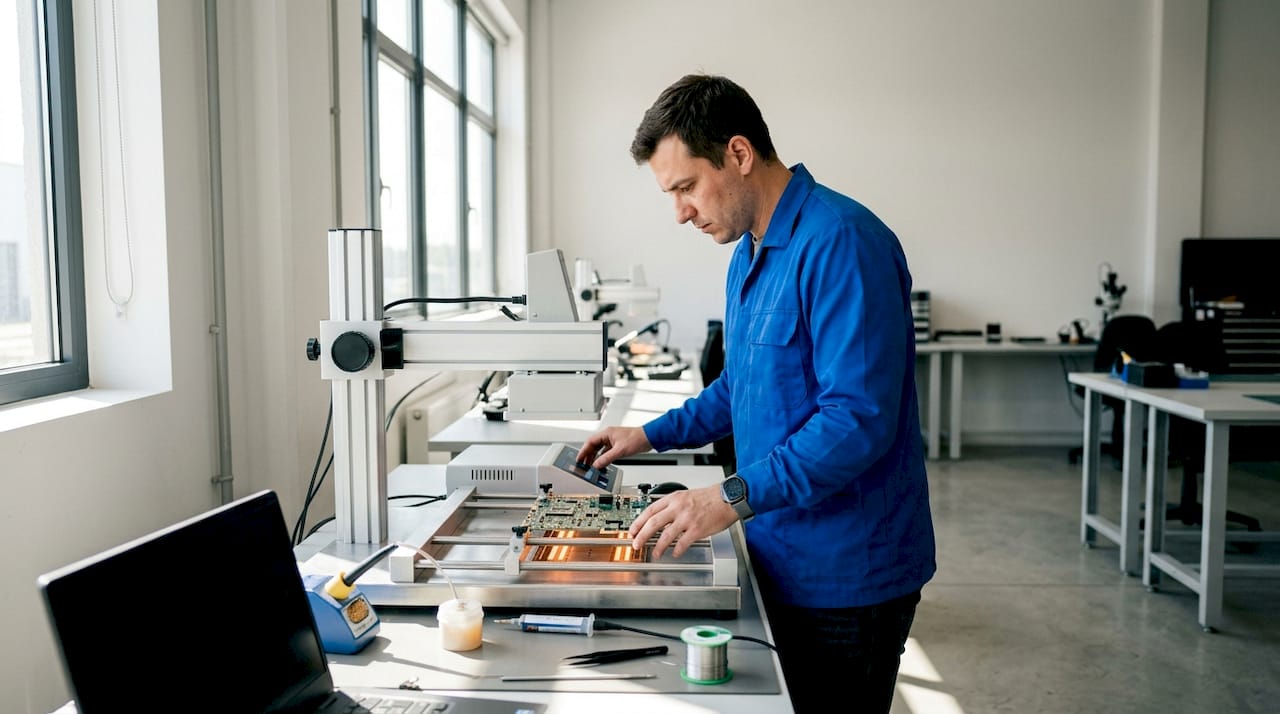
What tools do you need for component-level repair?
The right equipment makes a significant difference to your results. Attempting complex repairs with inadequate tools leads to pad damage, cold joints, and failed components.
Core tools for component-level repair:
Hot-air rework station. Removes and reflows surface-mount components. A station with adjustable airflow and temperature is far more controllable than a basic heat gun.
Soldering iron with fine tips. Used for through-hole components, drag soldering, and trace repair. A temperature-controlled iron is non-negotiable.
Preheater. Brings the whole board up to a safe working temperature before localised heat is applied. Reduces thermal stress significantly.
Smart tweezers. Measure resistance and capacitance in-circuit, helping you identify failed passives without desoldering them first.
Digital microscope or stereo microscope. Lets you inspect solder joints, pad condition, and component markings clearly. Repairs at this scale are very difficult to do accurately without magnification.
Flux and Isopropyl Alcohol. Flux improves solder flow; IPA cleans residue. Both are consumables you will use on every job.
For BGA rework specifically, standard hot-air stations are not sufficient. You need a dedicated infrared rework station with bottom-side preheating to achieve the even thermal profile that BGA chips require. Hobbyist tools rarely suffice for this level of work. Schematics and component datasheets are equally important resources. They tell you the correct values, orientations, and voltage ratings for every part you are replacing. Communities such as the Louis Rossmann repair forums and courses on platforms like Udemy offer structured learning paths for anyone building these skills from scratch.
Key takeaways
Component-level repair is the most cost-effective and data-safe approach to fixing a faulty circuit board when the damage is localised and the board substrate is intact.
Point | Details |
Definition | Component-level repair fixes individual parts on a board rather than replacing the whole assembly. |
Cost savings | Repair typically costs 40–70% less than full board replacement. |
Repair versus rework | Rework corrects factory defects; repair restores boards after service damage, often with permanent modifications. |
Thermal and flux control | Preheating to 100–150°C and cleaning with IPA after each step prevents the most common causes of repair failure. |
Repair feasibility | Repair is viable when cost stays within 30–40% of replacement price and the board substrate is undamaged. |
My honest view on learning component-level repair
I have seen a lot of people start out in electronics repair with the right enthusiasm but the wrong expectations. The most common mistake is underestimating how much thermal management matters. New technicians focus on the soldering iron and forget that the board itself needs to be at the right temperature before any localised heat goes near it. That single oversight causes more pad damage than almost anything else.
The other thing I notice is impatience with diagnosis. Replacing a component without confirming the root cause is the fastest way to do the same repair twice. A five-minute check with a multimeter and a schematic saves you an hour of rework later.
What I find genuinely satisfying about component-level repair is the sustainability angle. Every device you bring back from a failed board is one less piece of electronic waste. Given how much energy and raw material goes into manufacturing a modern smartphone or laptop, keeping that hardware in use for another two or three years is a meaningful outcome. The skill takes time to build, but the repair-first mindset is worth developing. If you want to understand what goes wrong at the board level before you start repairing, the Rapidrepairsldn article on water-damaged device recovery is a useful starting point.
— Joshua
Professional component-level repair from Rapidrepairsldn
Some faults go beyond what hobbyist tools can handle, particularly BGA chip failures, logic board shorts, and water-damage corrosion on Apple devices. Rapidrepairsldn specialises in exactly this kind of work, carrying out component-level fault diagnosis and repair on iPhones, iPads, and MacBooks from its London workshop.
The team uses professional infrared rework stations, microscopes, and schematics to trace faults accurately before touching a single component. If your device has stopped charging, will not power on, or is showing signs of liquid damage, the iPhone repair service and iPad repair service pages give you a clear picture of what Rapidrepairsldn can do. Laptop motherboard repairs are also available for those dealing with failed MacBooks or Windows machines.
FAQ
What is the difference between component-level repair and board replacement?
Component-level repair fixes individual faulty parts on the existing board, preserving data and costing significantly less. Board replacement swaps the entire assembly, which risks data loss and typically costs far more.
Is component-level repair worth it for a phone or laptop?
Repair is worth it when the fault is isolated, the board is physically intact, and the repair cost stays within 30–40% of the replacement board price. For devices holding important data, repair is almost always the better option.
What components are most commonly repaired on circuit boards?
Resistors, capacitors, diodes, and integrated circuits are the parts most frequently replaced during circuit board repair. Power management ICs and charging controller chips are particularly common failure points in smartphones and laptops.
Can I do component-level repair at home?
Basic repairs such as replacing electrolytic capacitors or reflowing cold solder joints are achievable at home with a decent soldering iron, hot-air station, and flux. BGA rework requires professional infrared equipment and is not practical without it.
Why do most repair shops not offer component-level repair?
The skill level, equipment cost, and time required are all significantly higher than for standard screen or battery replacements. Rapidrepairsldn explains why most repair shops avoid motherboard work, and why specialist shops are the right choice for these faults.
Recommended
Comments